Fabulous five : Edible gardening

There are several reasons I grow edible plants in my garden. It occured to me that people sometimes wrongly think that vegetable garden is something for country folk. As a women living in the suburbs with a post stamp garden I can tell you anyone can grow edible plants.

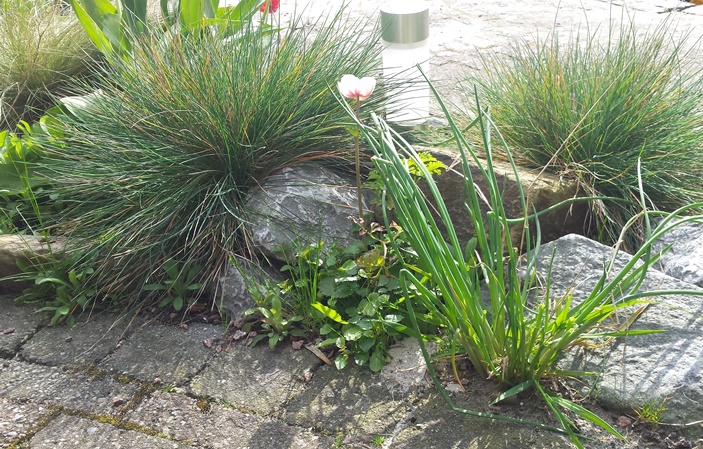
GardenChives

Chives in my rock garden

Vegetables and greens that are easy to grow:

  1. Wild garlic, I took some bulbs from my mothers garden and planted them under my pear tree. The leaves and flowers can be eaten raw or cooked. The garlic flavour and spinach texture combine well with steaks, mushrooms or salmon. I rarely eat mine raw, just because that’s safer.

    Rocket in our gnome garden

    Rocket in our gnome garden

  2. Rocket, once you have had this plant in your garden, you will never need to sow it again. It spreads like a weed! When I have to harvest great amounts, I make my own rocket pesto.  It is also great to mix through my salad leaves, or to garnish my pizza‘s.
  3. Rhubarb, a zero maintenance plant! I have this plant thanks to my parents garden. My father made a rhubarb patch next to the house. He devided some rhubarb plants from my grandfathers garden to create this patch. Now I have a piece of this patch in my garden. I like to use the rhubarb to make rhubarb crumble. I freeze some rhubarb in the summer, so I can even enjoy this dish in the winter!
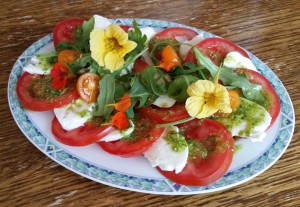
  4. Nasturtiums. Another easy plant to sow. You can eat the leaves and flowers of this annual plant in a salad. On top of all this, they look great too. I like to grow lots of edible flowers, such as pansies.

    Tomatoe salad with nasturtium

    Tomatoe salad with nasturtium

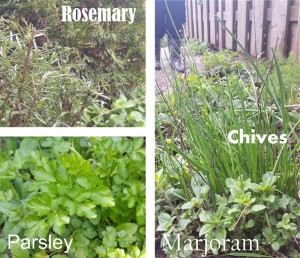
  5. Herbs. Nothing beats fresh herbs, so I like to always have these herbs on hand:
    • Chives (we even eat the flowers!)GardenHerbs
    • Flat leaf parsley
    • Marjoram
    • Thyme
    • Rosemary
    • Regular mint, balm mint and peppermint – also great for making (iced) teas
    • Sage

You can plant these plants in a seperate vegatable patch, but my garden is so small that I choose to let my edible plants live among the decorative plants. But all the plants in this list would also be very happy living in a flower pot or window box.

Adding edible plants to your garden or balcony is also a great way to teach your children how their vegetables grow. You could even consider making a gnome garden. For children I would always recommend including some strawberry plants. They are low maintenance, high reward plants for children.

I recommend choosing plants you enjoy eating and easy to grow & maintain. This way you are more likely succeed and reap the rewards soon!

Happy easter!

For this easter we are staying at home with our little family. Some of you might have bigger plans and feel a little overwhelmed by now. These are some easy recipes with maximum impact on your guests:

HappyEaster2016

Remember to keep your cooking for the day simple (put more effort in the preperations) and make sure you have plenty of time to enjoy your family and guests!

Let’s bake!

My son and I love making cookies on a rainy day. I know now to make this a truely memorable experience with these nifty tricks:

  • Make the dough a day in advance, and keep it in the fridge. Cookie dough also freezes well, so I like to make a large batch and freeze half for later.
  • While your cookies cool, and your children are otherwise occupied (in my case: building some new Lego creation), create some colorful icing for decorating.
  • Place small amounts of decorations in a muffin tin, this keeps your table organised. When we are done decorating, we put the leftover decorations aside. My son mixes these in a bowl of yoghurt for a festive desert that evening!

    www.cookingwithmykid.com

  • Display your children’s creations on a pretty dish or cake stand. They take a lot of pride in their work.
  • Place the cookies in a transparant zip lock bag, then attach this bake to a decorative tray. This makes a great present for grandma or an aunty with a sweet tooth!
    WrappedCookies
  • Remember your child’s attention span is a lot shorter than yours, don’t be surprised if they are bored after making 3 cookies. In their minds this is still helping and they will take the credit for all the work! This always makes me smile, because it does mean my son takes pride in his creations.
  • Nigella has provided a great cookie recipe in het book “how to be a domestic goddes”. Me and my 4 year old have made multiple batches of these cookies, and they never disappoint! These cookies are tasty, with and without the colorful icing.

CookiesS

  • I love making chocolate chip cookies. All my son does is make dough balls and press them flat, but he has so much fun!
    cookiemonster

Find more tips for cooking with children here.

Cheese fondue

On a cold and wintery day, we just love making cheese fondue.

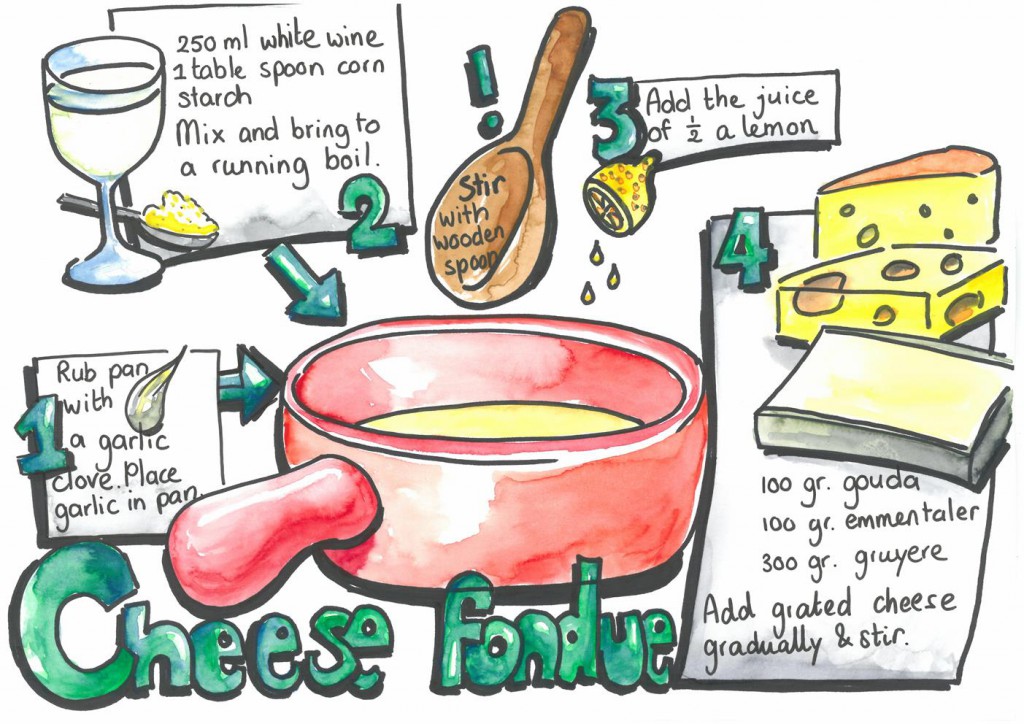
As a metnlintje first, I made you a (downloadable) decorative recipe! You can just follow the instructions on the FondueSketch to make the fondue. This recipe serves 2 greedy adults and a toddler. Don’t forget to season to taste with salt, pepper and nutmeg.
FondueSketchM

I grew up in Switserland. This means I am quite a puritan about how you are supposed to enjoy your home made fondue. These are my Cheese fondue guidelines:

  • Serve with cubes of (day old) bread for maximum cheese absorbtion when dunking.
  • Have wine or tea with your fondue. If you don’t, I was told big clumps of cheese form in your tummy!
  • You can also dunk pieces of pear, button mushroom or cherry tomatoes
  • Serve with strong flavored goodies/tappas so your guests can cleanse their pallet and enjoy every moment of cheese sensation. Excellent goodies are:
    • Thin slices of high quality chacutery like salame or parma ham for a salty tang
    • Pickles like gurkins or pickled onions for a sour balance
    • Sweet fruit like grapes, (tinned) peaches or pear
  • Use a thick pan that holds and distributes heat well (le caquelon)
  • Keep your fondue warm on a (matching) warmer.
  • The crust that forms on the bottom is sacred! It’s the best part, so scrape every last bit of the bottom.

My family loves cheese, so everyone joins in for this one at our home. It always makes a festive meal in our home. We light the candles and we take our time to saver the cheese but it also leaves lots of time for conversation. Hope you enjoy it too!

4 principles for a tasty salad

A good salad is about balance and contrast. If you keep the following 4  principles in mind, you can make special salads every day of the year.

  1. Don’t combine too many ingredients, the best salads have around 5 main ingredients. This ensures you taste every ingredients shines.
  2. Make a simple dressing that compliments your ingredients. If you insist on using a complex dressing like a ceasar dressing, keep your salad even more simple: using up to 3 ingredients. For more information on ceasar salad read about my dutch ceasar salad here.
  3. Balance your flavors. Make sure you have a sharp/spicy, sweet, salty, sour, savory and bitter component in your ingredients and dressing.
    Sparpness can come from unions, chili or pepper.
    Sweet can come form honey in your dressing or some fruit or sultanas.
    Salty can come from some cheese, bacon,salty nuts or even sea salt.
    Sour can come from sertain lettuce leaves or butter milk in your dressing.
    Savory kan come from nuts, croutons or bacon.
    Bitter notes can come from your choice of leaves, cheese or fruits like grapefruit.
  4. Balance your textures. Make sure you have a variety of textures. Croutons or nuts for some bite, soft cheese or pears, creamy dressing and crunchy lettuce or cucumber.

FestiveLettuce1

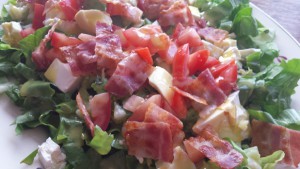
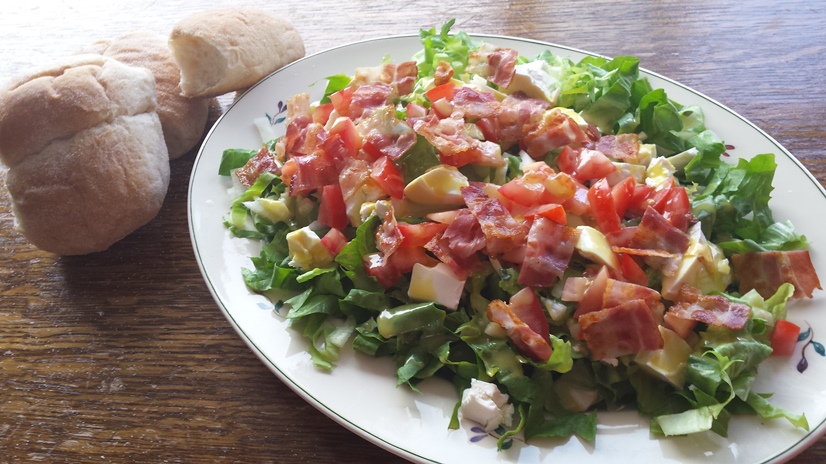
The other day I made a tasty well balanced salad using endive leaves, feta cheese , union, tomatoe and bacon with a simple honey mustard dressing. For the honey mustard dressing combine equal quantities of mustard and honey. For a more runny dressing add water of (butter) milk to this mixture.

Fabulous five BBQ recipes!

It’s summertime and we are crazy for barbecues. Here comes my list of favorites!

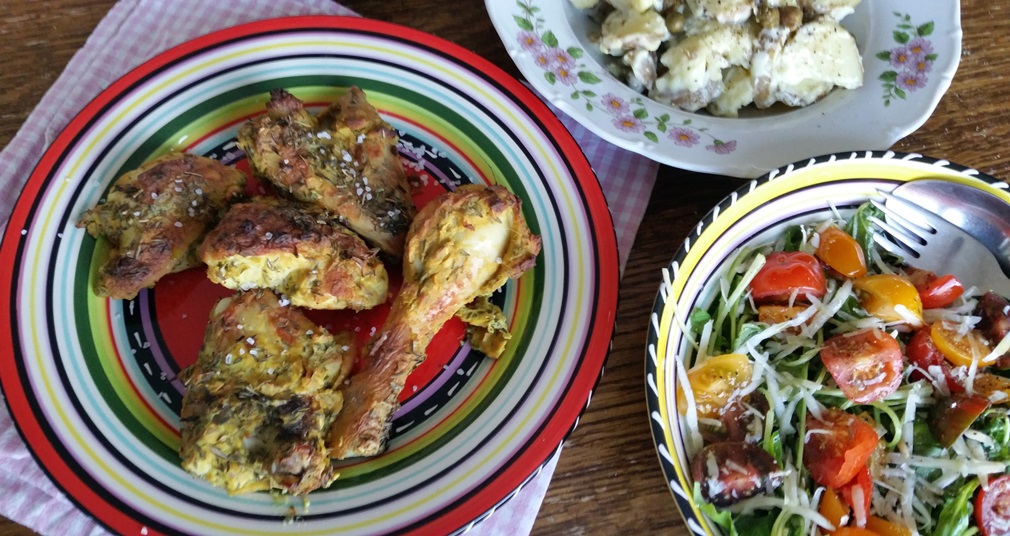
  1. Mustard chicken. Makes for sweet and succulent morsels of chicken every time! Tastes great with some potato salad and a flower salad!
    Chicken1
  2. Fried sweet potatoes. I found a great recipe on www.theyummylife.com, still have to try it!
  3. I love having a good baked potato. I am the least patient cook in the world. So I pre-cook my potatoes in the microwave. Simply wash your potatoes and prick them all sides with a fork. Cook them in your microwave for 3 minutes, then turn them around, feel if they are soft as this means they’re cooked. If not blast them for another 2 minutes, then check them again. Wrap your potatoes in foil and crisp them up on your barbecue.
  4. Zucchini/courgette or aubergine are great for grilling too. Just slice in 5 mm slices. Sprinkle them with olive oil and thyme. Season to taste and grill on each side.
    aubergine
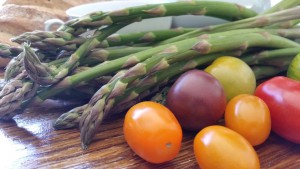
  5. Grilled asparagus, precook them if the stems are thicker. Just lightly coat them with olive oil. Season them after grilling and dress with a few drops of lemon.
    asperagus

For more great barbecue side dishes:

Flowers

In Holland we are spoiled for choice. We have flower shops full of beautiful and affordable flowers. Still, I think your own picked bouquet is a more personal gift.

?

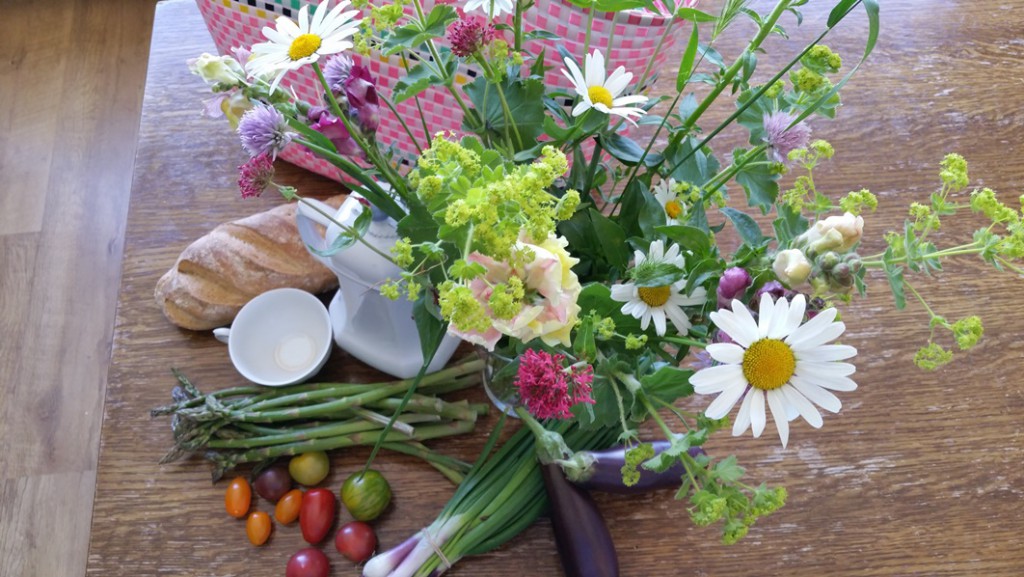
This bouquet contained daisies, chive flowers, snapdragons and some plants I couldn’t name if I tried. There are some important attention points when you pick flowers:

  • Ask permission first, or pick from your own garden
  • Make sure you wipe of any bugs or little creatures
  • Cut the flowers at an angle
  • Cut flowers before their prime, so they open in the vase
  • Take the leaves off the part of the stem that will be submerged in water
  • Keep the stems moist
  • Use greens to bulk up your bouquet
  • Contrasts make wild flower bouquets beautiful, look for different textures, colors, smells and use different lengths.

Don’t forget to enjoy the process, I know I did!

My tips for easter

Easter for me symbolizes new beginnings. It is also another occasion to relax and have a good time with people you love. Here’s my new and older suggestions for your Easter preparations:

  • Decorate some branches for Easter. Just trim any tree or shrub you like.

PaasBoom

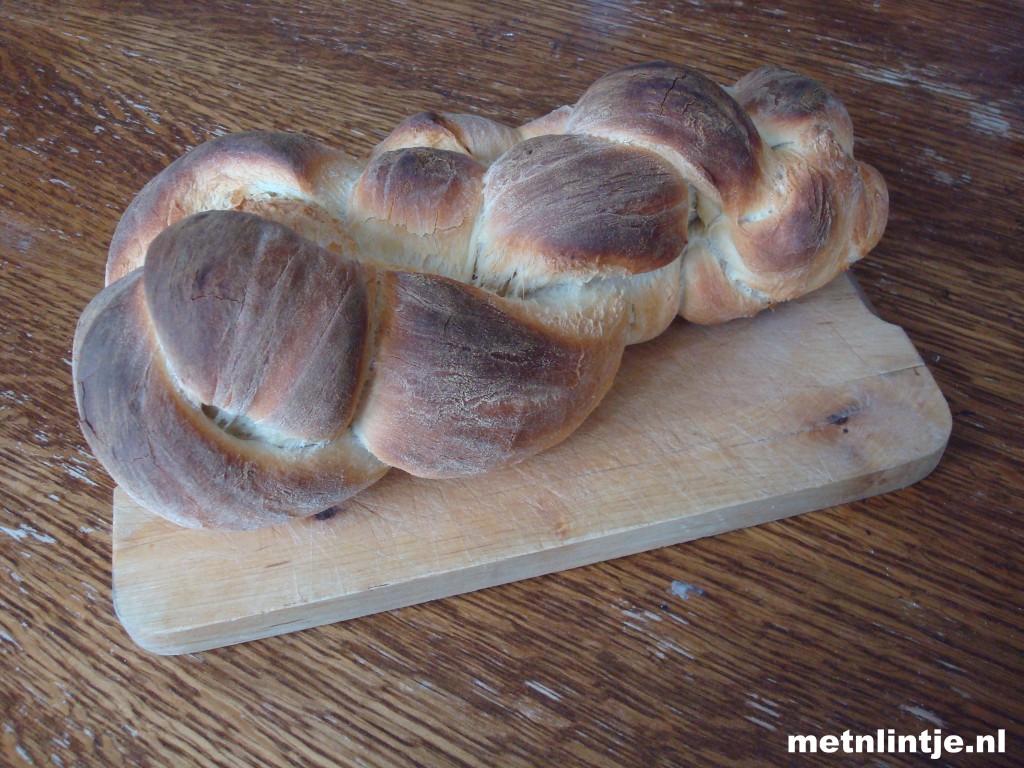
  • Make your own bread, it’s easier than you think. Read about baking bagels right here. By making the dough on Saturday evening, and doing the first proofing in your fridge, your timing will be perfect for brunch on Easter Sunday.

Vlechtbrood

  • Decorate Easter eggs, a fun activity for the whole family. Boiled eggs will keep for a few days in your fridge. Make them a few days in advance. For an even easier alternative: buy boiled eggs.

Eggbox

  • Make pancakes for your Easter brunch. The batter can also be made a day in advance and kept in your fridge.
  • Bake some yummy cupcakes and ice them in easter colors.
  • After hunting for Easter eggs, hand out home made bags to take your treasures home.

Tasjes

Perfect Pizza Paluzza

Thanks to a sweet friend of mine, I am the proud owner of the Italian cooking bible “the silver spoon”. The book itself ways several kilo’s, but is worth all the shelf space it occupies in my book cupboard.

My Italian cooking bible

What you notice when you leaf through this book is how delightfully simple the Italian cuisine really is. Few ingredients are used to make the star of the show shine. I would recommend this book to any starting home cook.

One of my favorite recipes from “The silver spoon” is pizza. I use the recipe for making pizza dough but for the toppings I let my guests decide. I knead the pizza dough the evening before. I let the dough proof in the fridge. This means that making the pizza’s takes little time on the day itself.

My toddler loves pizza. From the moment we bought his kitchen stool he has been joining me to “help” with my cooking. And pizza is the perfect opportunity for this because:

  • Your toddler can help you knead the dough. Simply give your toddler a small portion of the dough and continue kneading together. My son loves pushing his fingers or fists into the dough! Simply combine the dough every now and then, and give your toddler a new ball to knead.
  • Your toddler can help dusting your work top and roll out the dough. At this point in time my toddler runs to the kitchen  cabinet container a big and a small rolling pin. My toddler is so experienced now (3 years old), that he rolls out a pizza all by himself, but you might wanna help a bit the first few times.
  • Your toddler can prick holes in the pizza with a fork.
  • Your toddler can sprinkle cheese, oregano and veg on his own pizza.

pizza

My son is always extremely proud of his creation and walks to the oven to check on his pizza regularly. Both dad and son are big pizza lovers.

Pizza dough (for 2 adults and 1 toddler)

  • 500 gram plain flower and extra for dusting
  • 7 gram instant yeast
  • 1 1/2 tsp salt
  • 240 ml lukewarm water
  • Olive oil

Mix your flower, water, salt and yeast together. Cover the mixture with a kitchen towel and let this mixture stand for 10 minutes (you can skip this step, but I promiss you it makes the kneading easier.

Knead your dough for a minimum of 10 minutes. Time your kneading, it will seam like forever the first time, but after 10 minutes you will have that smooth, elastic stuff people like to rave about.

tip: knead your dough on a table top, not your kitchen counter. This lower surface makes it possible for you to use your body weight when pushing into the dough to stretch it.

Make sure your dough is covered in oil to protect it from sticking and place it in a large container. The dough (at least) will double in size. Make sure you prevent your dough from drying out by applying an air tight lid or use kling film. Now you have two choices: let your dough proof in the fridge for up to 24 hours, or proof it at room temperature for 1 hour.

pizza2

When you want to make your pizza, take the dough out of the fridge, knock it back and let it get to room temperature for at least 30 minutes. Now you can devide your dough into 2 large balls and one smaller ball. Protect your dough by covering it with a (damp) kitchen towel until you roll out your pizza.

Roll out your dough to form your pizza. Prick holes with a fork where the topping goes.

Place your toppings on your pizza and bake for 10 to 20 minutes at 220 degrees.

I will blog about my husband’s favorite pizza some other day.