Tasty tuna melt

Tasty tuna melt
Print Recipe
This is a lovely store cupboard recipe. We have all ingredients for this recipe in our home any day of the week. If you like tuna as much as I do, it makes for great comfort food. I love the contrast between the luke warm tuna salad and the piping hot melting cheese.
Servings Prep Time
4 people 20 minutes
Cook Time
5 minutes
Servings Prep Time
4 people 20 minutes
Cook Time
5 minutes
Ingredients
Tuna salad
Tuna melt
Servings: people
Instructions
  1. Preheat your oven grill. If your oven does not have a grill setting, heat to the highest temperature.
  2. Mix the ingredients for the tuna salad well.
  3. Add olive oil or mayonaise to make your salad more creamy if needed.
  4. Spread the tuna salad on the toasted bread.
  5. Sprinkle with cheese.
  6. Grill for about 5 minutes. Monitor carefully, you don't want the cheese to melt and brown slightly.
  7. Sprinkle with your favorite hot sauce.
Recipe Notes

If you serve these with a salad, they make a great dinner.

Share this Recipe

Awesome Autumn Pie

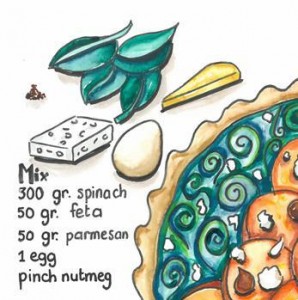
This is another tasty vegetarian pie. It is full of veg and color, but just as rich in flavors!AutumnPie2

Awesome Autumn Pie (4 servings)

  • 1 butternut squach, peeled, in 5 mm slices
  • 1 pie dish lined with puff pastry
  • Pie filling:
    • 300 gr spinach
    • 50 gr crumbled feta
    • 50 gr grated parmesan
    • 1 egg
    • pinch nutmeg
  • Sprinkle squash with
  • 1 tsp hot paprika
  • 1 tsp cinnamon
  • 50 gr feta
  • 1 cup of roughly chopped hazelnuts
  • 1 tbsp honey
  1. Blind bake your pie in a 220 degrees C oven for 15 minutes.
  2. Boil your butternut squash slices until just soft enough to eat.
    AutumnPie4
  3. Mix the pie filling.
    AutumnPie3
  4. Fill the base with the filling, cover with the butternut squash slices.
  5. Sprinkle with hot paprika and cinnamon.
    AutumnPie5
  6. Top with feta and hazelnuts.
    AutumnPie6
  7. Drizzle over the honey, season with some freshly ground pepper.
  8. Bake in the 220 degree oven for about 20 minutes.

Find more pie and quiche recipes.


My Vichyssoise or Delicious & creamy cold soup

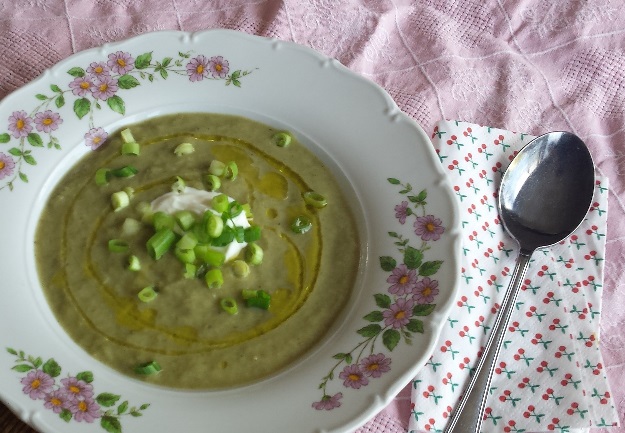
VichysoisseSWhen the weather is getting hotter, I recommend you spend an evening making a large batch of this beautiful soup. It is both healthy and tasty, and well loved by all family members. I like to use vegetable stock, this means the dish is completely vegetarian and all my friends can enjoy it as well.

The soup can be served hot or cold. I would cool the soup for at least 4 hours before serving. That’s why I like to make this dish a day in advance.

This soup is also beautiful als a small course at a dinner party or for a high tea. Just serve the soup in a dainty tea cup or a small glass instead of a large plate.

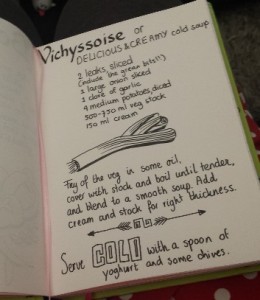
Vichyssoise (6 portions)

  • 2 leaks, sliced and thoroughly cleanVichyssoiseMed, including the green part
  • 1 large onion, sliced
  • 1 garlic clove, finely sliced
  • 4 medium potatoes, diced
  • 500 – 750 ml vegetable stock
  • 150 ml cream
  • 1 tbsp olive oil
  • To serve:
    • Greek yoghurt or sour cream
    • Chopped spring onion or chives
  1. Fry off the potatoes, onion, leaks and garlic until the onion is translucent.
  2. Add vegetable stock until all ingredients are submerged.
  3. Simmer until the potatoes are cooked.
  4. Blend the soup to a smooth puree, add stock if you want a thinner soup.
  5. Stir in the cream and season to taste. Remember that cold soup will need stronger seasoning.
  6. Serve your soup with a dollop of Greek yoghurt or sour cream and some chopped chives or spring onions.

VichysoisseXL

On hot summer evenings I enjoy a plate of this cold soup with some fresh bread. The best thing is that all you have to do is serve it up, no mess or fuss, just a cooling and healthy dinner.

Crunchy kohlrabi slaw

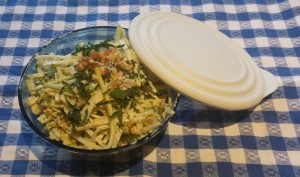
This is coleslaw with a twist. I love preparing a large batch of any type of coleslaw. I bring it to work, serve it as a side dish with some fried chicken (like chicken fingers) or with our barbecues in the summer.

Kohlrabi1

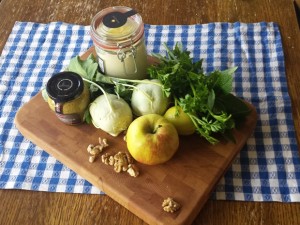
The kohlrabi has both great crunch and lovely subtle cabbage flavor. It pears great with the apple and the fresh dressing. It can be prepared day(s) in advance, making it a practical dish too!

Kohlrabi slaw

  • 2 kohlrabi, sliced in match sticks, or coarsely grated
  • 1 large apple, in match sticks
  • 2 handfuls of walnuts, roughly chopped
  • 1 handful of parsly, sliced in fine slivers
  • 1 handful of mint leaves, sliced in fine slivers
  • Dressing:
    • 1 tbsp mustard
    • 2 tbsp good quality mayo (or even homemade mayo)
    • Juice of 1 lemon
    • 2 tbsp yoghurt

Kohlrabi3

Tasty chicory boats

I like making this salad as a starter for a dinner party. It is full of strong flavors, but very well balanced. There is also a great variation in textures. I can guarantee you that this will definately intrigue your dinner guests.

This dish also makes a great lunch salad. When combined with a piece of leftover chicken it is very filling.

Chicory taste explosion

  • 3 chicory
  • 1 apple, finely sliced (no need to remove the skin, this adds color)
  • 1 handful of walnuts, roughly chopped
  • 75 gr blue cheese
  • Juice of half a lemon
  • Olive oil, generous sprinkling
  1. Remove the 4 outer leaves of each chicory. Keep them whole for serving the salad.
  2. Remove the cores and slice the rest of the chicory in 5 mm strips.
  3. Mix your chicory strips with the other salad ingredients. Dress the ingredients well as both the apple and the chicory will discolor without the dressing. Season to taste.
  4. Devide your salad over the chicory leaves for perfect tasty boats.

Eggplant lasagna

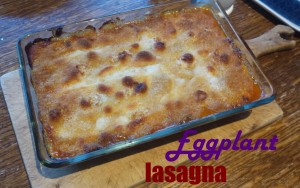
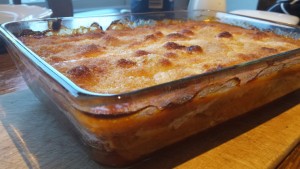
This is a great vegetarian family meal. My son will eat anything covered in tomatoe sauce. The melted cheese on top combined with the crispy topping will seduce any vegetable sceptic.

It is essentially a lasagna with grilled eggplant instead of pasta sheets. It makes a great lunch or dinner when combined with a salad.

EggplantLasagna3

Eggplant lasagna (3 person meal)

  • 2 eggplants, in long 5 mm strips
  • 500 ml italian tomato sauce (your own recipe, mine or from the shop)
  • 200 gr kwark or cottage cheese
  • olive oil for frying
  • 250 gr mozzerella and/or dutch cheese in slices
  • Optional for a crust: 2 cups of bread crumbs and 75 gr butter
  1. Cut your eggplant in slices, season them on each side and lightly oil them.
  2. Fry your eggplant slices in a skillet on each side.
  3. Make layers:
    1. Tomato sauce
    2. Eggplant slices
    3. Kwark
    4. Eggplant
    5. Tomato sauce
    6. Eggplant
    7. Kwark
    8. Eggplant
    9. Tomato sauce
    10. Cheese slices
    11. Optional, for a crispy top: Sprinkle on bread crumbs and devide knobs of butter over the crumbs.
  4. You can store this dish in your fridge or bake it right away in a 220 degrees C oven for 20 minutes.

EggplantLasagna2

Together with a Dutch ceasar salad, this makes a great vegetarian meal.

Read more about oven dishes here.


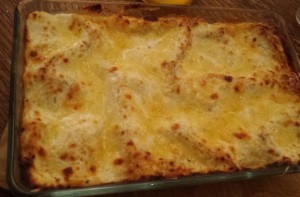
Spinach, egg and mushroom lasagne

This one of those vegetarian dishes which my family just loves. It is so full of flavour and different textures that everybody feels satisfied after eating this green lasagne.

spinach2Unlike a traditional lasagne, there is no need for endless simmering to create a rich sauce. This sauce is made by simply mixing the right ingredients. You might never have tried using egg in a lasagne before, but I can promise you it is a perfect match with the ingredients in this dish. It also helps you get you protein intake for the day.

Like an oven bake, I like to make this dish a day or two in advance. This helps me stay organised with our busy schedules.

If you are an avid meat lover you could easily add bacon cubes or pancetta to the mushroom mix.

Spinach, egg and mushroom lasagne (3 portions)

  • 300 grams of spinach (sliced and frozen, or stir fried and finely sliced)
  • 250 grams of (button) mushrooms
  • 1 onion, finely sliced
  • 1 clove of garlic, finely sliced
  • 500 grams of “kwark” (replace with cottage cheese and/or creme fraiche)
  • 120 grams of grated cheese
  • 3 eggs, hardboiled
  • lasagne sheets, about 150 grams
  • oven dish of 25 by 35 cm, or a similar size

spinach

  1. Fry your onions, mushrooms and garlic until brown and soft.
  2. In a mixing bowl, combine the spinach, mushroom mix, half of the “kwark” and half of the cheese.
  3. Season the filling with salt, pepper and a pinch of nutmeg.
  4. Now you are ready to make your layers:
  5. A layer of filling, topped with lasagne sheets.
  6. Top the sheets with more filling and your sliced egg. Season your egg and top with lasagne sheets.
  7. Another layer of filling, topped with lasagne sheets.
  8. For your final layer. Mix half of the leftover cheese with your kwark and season. Spread this mix over the lasagne sheets.
  9. Top your bake of with a sprinkling of grated cheese.
  10. Now your lasagne is ready for the oven, or for your fridge.
  11. Bake in the oven at 220 degrees C for 30 minutes.

Find my favorite oven bakes here.

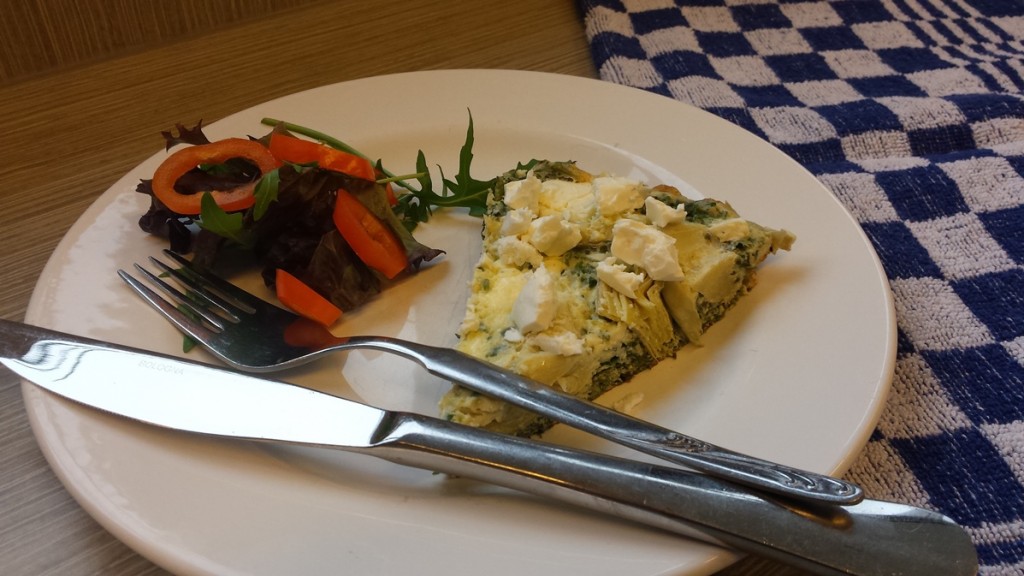
Winter omelet

We love having curly kale in the winter. This healthy veg is full of flavor and nutrients. The other day I had some leftovers, which inspired me to create a tasty lunch. This omelet tastes great warm or cold. Making it an easy treat to bring for your worklunch as well.Omelet2

When I finished cooking this dish, I was worried that this healthy creation would have no flavor. However, the strong flavors of the kale, artishoke and feta come together beautifully. It is also very filling, making it easier for me to stick to my new years resolutions. My colleagues had a taste, and insisted I share the recipe, luckily it is surprisingly easy!

Winter omelet (2 – 3 portions)

  • 150 grams of finely sliced curly kale (could be replaced with cavolo nero or spinach)
  • 200 grams of (tinned) artishoke hearts, in wedges
  • 100 grams of feta
  • 2 eggs
  • 2 tbsp soft curd cheese, known as “kwark” in Holland
  • 1 tbsp of oil for frying

Omelet1

  1. Blanch your kale for one minute in boiling water.
  2. Drain and cool your kale.
  3. Mix the kale, eggs and soft curd cheese and season to taste.
  4. Heat a frying pan and add your oil. Get your pan as hot as possible.
  5. Add your mix and lower the heat right away.
  6. Spead the artishoke pieces over your omelet and push them in gently.
  7. Crumble your feta over your omelet and push in gently as well.
  8. Cover and fry on a low heat until your egg has set.

Enjoy your omelet with a salad and a glass of white wine!

Read all my recipes here!

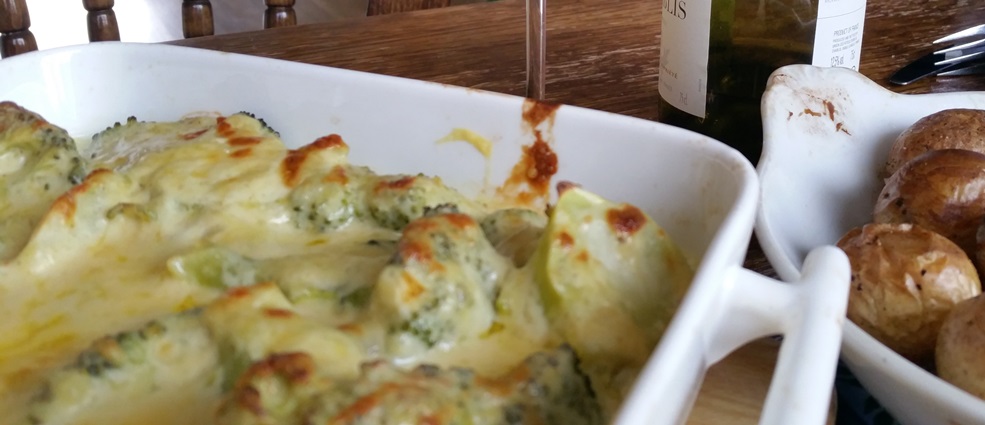
Broccoli feast

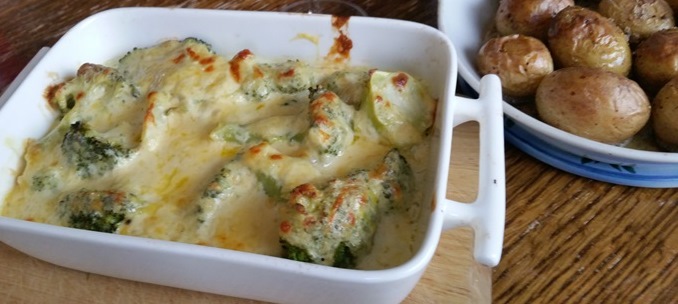
I am always looking for a way to make broccoli more interesting. Somehow this veg does not apeal to me, but I love it with cheese! This recipe makes my life easy. Especialy because I can do all preperations the day before. All I need to do when I get home is heat the dish in the oven.brocolli1

We like eating this simple broccoli casserole with roast potatoes and maybe a salad on the side. As the sauce is so rich, we like having this broccoli feast as a vegetarian dinner. As a variation to this dish you could mix in cauliflower or maybe .

Broccoli feast

  • 1 head broccoli, broken into florets
  • For the cheese sauce:
    • 1 onion, finely sliced
    • 30 grams butter
    • 30 grams flour
    • 150 ml white wine
    • 150 ml milk
    • 150 ml stock
    • 1 tsp mustard
    • 2 cups of grated cheese, I like old Gouda or a gruyere for this dish
    • salt, pepper and a pinch of nutmeg
  1. Boil your broccoli until tender. Rince with cold water to stop the cooking process. Place the broccoli in an ovenproof dish and set aside.
  2. Gently fry the onion in the butter intil soft.
  3. Add the flour. Stir this mixture on a low heat for at least 2 minutes.
    Do not skip this stage to prevent a grainy, floury taste.
  4. Add the liquids gradually, while mixing and incorporating into a thick sauce.
  5. Stir in 1 cup of the cheese and the mustard.
  6. Season with nutmeg, salt and pepper to taste
  7. Pour your sauce over the broccoli and sprinkle with the rest of the cheese.
    (You can prepare this dish a day before and keep it in the fridge.)
  8. Preheat your oven at 220 degrees C. Bake your broccoli for 15 to 20 minutes or until golden brown.

Brocolli

Beet burgers

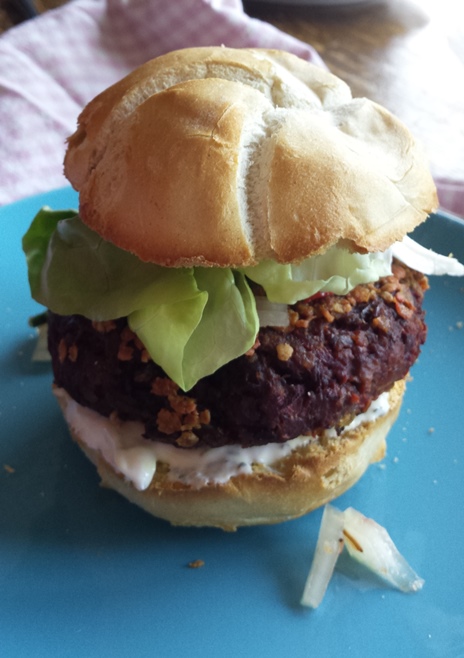
BietenB2My friend loves taking me to great lunchrooms. At one of these fabulous lunches I tried my first beetroot burgers, and I was hooked. Unlike other vegetarian burgers this burger does not try to replace meat, it is a totally new flavor sensation providing great texture and filling you up for the rest of the day.

Obviously, it is also a very healthy alternative to your regular meaty version. But that is not why you should try this. This is a new flavour you have to introduce to your pallet, the healthy part is just a bonus!

I have to honestly admit this dish isn’t for everyone, especially meat lovers that think veggie burgers are blasphemy. And you have to love beetroot. I do think that offering lots of garlic rich yoghurt sauce will help convince your family members.

These burgers and sauces can easily be made a day in advance, making them the perfect easy home made fastfood!
BietenB

Beet root burgers (4-6 burgers)

  • 1 uncooked medium beet root, finely grated
  • 800 grams of tinned beans, I used field peas (we like to call them kapucijners in Holland)
  • 1 onion, grated
  • 2 eggs
  • 2 cups of oats

Mash up the peas (in the foodprocessor), I like leaving some chunky pieces for texture.

Mix in the beet root, onion and egg. Season the mixture with salt and pepper.

Add half the oats and let the mixture stand so the oats can soak up the moisture. After 20 minutes, check the mixture and add oats as needed. You want a firm, non-sticky mixture that still holds together well. I like to compare it to how my meatball texture feels when it is just right.

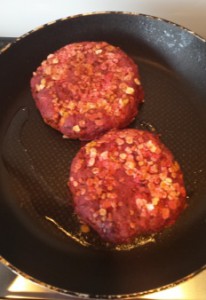
Shape your burger paddies, dust with oats to prevent the paddies from sticking if needed and let them rest for at least 30 minutes. For the practical busy moms I recommend making these a day in advance.
BIetenBPan

Fry your paddies in some oil on a high heat for a few minutes on each side. After making the paddies crusty on each side, place the paddies in the 220 degree oven for 20 minutes.

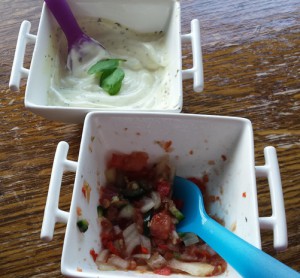
Serve with some fresh crispy buns, some lettuce, a spicy yoghurt sauce and a yoghurt mint sauce (you find the recipe with the posh fish and chips recipe).

Spicy sauce

  • 1 tomato in small cubes
  • 1 onion finely sliced
  • 1 finely sliced chili pepper
  • 2 tbsp lemon juice
  • handfull of freshly sliced parsley and/or koriander

Blend half the tomato, union and chili to a pulp. Mix the pulp with the other ingredients and season to taste.
BietenBSaus