Spinach and ricotta cannelloni

Spinach and ricotta cannelloni
Print Recipe
This is one of those family favorites. A dish I like to prepare in advance and bake on the day. It makes a complete meal, and it's vegetarian too! Using a piping bag might seem fiddly, but I think it is totally worth it!
Servings Prep Time
4 people 30 minutes
Cook Time Passive Time
20 minutes 10 minutes
Servings Prep Time
4 people 30 minutes
Cook Time Passive Time
20 minutes 10 minutes
Ingredients
Filling
Sauce
Main
Servings: people
Instructions
Make your sauce
  1. Gently fry your onion and garlic in the olive oil until soft.
  2. Add the herbs and fry for one minute before adding the white wine. Cook off the alcohol in 2 minutes.
  3. Add the tomatoes and let the sauce simmer while you prepare the canneloni. Season to taste
Fill your canneloni
  1. Combine the ingredients for the stuffing and season to taste.
  2. Fill your cannelloni using a piping bag or a small spoon.
Build your dish
  1. Preheat your oven to 220 degrees centegrade,
  2. Spoon a thin layer of sauce on the bottom of an oven proof dish.
  3. Line the canneloni in your ovenproof dish.
  4. Cover with the remaining sauce and sprinkle with parmesan.
  5. Place in the oven for 20 minutes or until golden and crispy on top.
  6. Let your dish stand for 10 minutes after removing it from the oven.
Recipe Notes

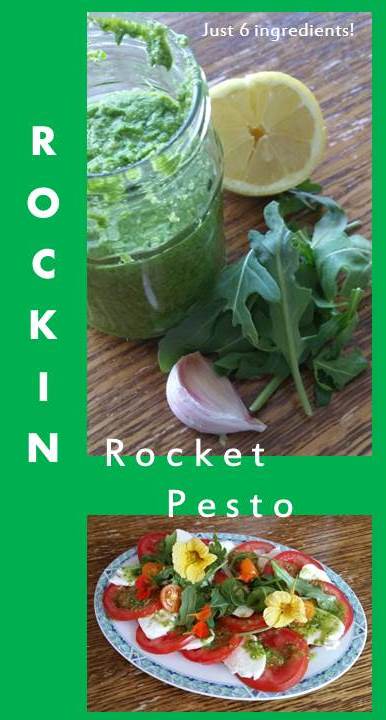
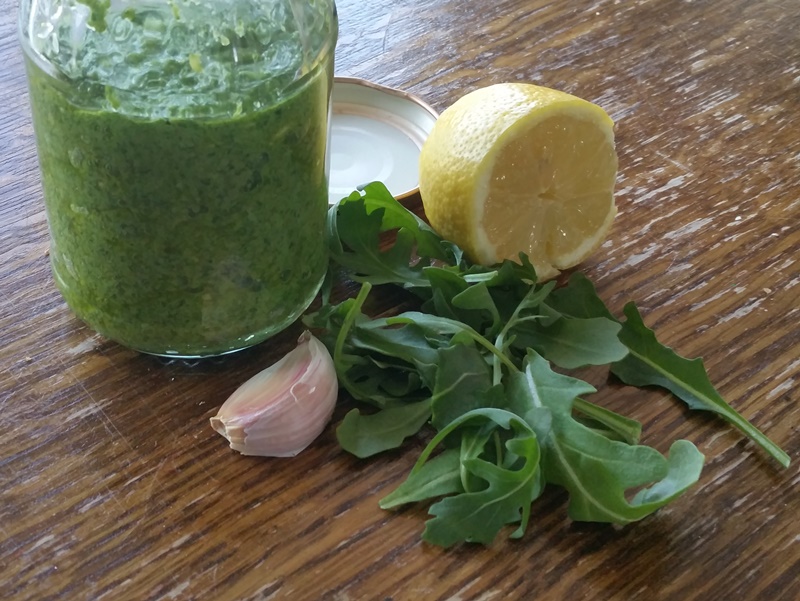
Instead of using spinach you could use 3 tablespoons of pesto or my rocking rocket pesto.

Find more oven bakes here.

Share this Recipe
 

Eggplant lasagna

This is a great vegetarian family meal. My son will eat anything covered in tomatoe sauce. The melted cheese on top combined with the crispy topping will seduce any vegetable sceptic.

It is essentially a lasagna with grilled eggplant instead of pasta sheets. It makes a great lunch or dinner when combined with a salad.

EggplantLasagna3

Eggplant lasagna (3 person meal)

  • 2 eggplants, in long 5 mm strips
  • 500 ml italian tomato sauce (your own recipe, mine or from the shop)
  • 200 gr kwark or cottage cheese
  • olive oil for frying
  • 250 gr mozzerella and/or dutch cheese in slices
  • Optional for a crust: 2 cups of bread crumbs and 75 gr butter
  1. Cut your eggplant in slices, season them on each side and lightly oil them.
  2. Fry your eggplant slices in a skillet on each side.
  3. Make layers:
    1. Tomato sauce
    2. Eggplant slices
    3. Kwark
    4. Eggplant
    5. Tomato sauce
    6. Eggplant
    7. Kwark
    8. Eggplant
    9. Tomato sauce
    10. Cheese slices
    11. Optional, for a crispy top: Sprinkle on bread crumbs and devide knobs of butter over the crumbs.
  4. You can store this dish in your fridge or bake it right away in a 220 degrees C oven for 20 minutes.

EggplantLasagna2

Together with a Dutch ceasar salad, this makes a great vegetarian meal.

Read more about oven dishes here.


Gnocchi bake

This dish may take you 40 minutes to make, but it is less than 10 minutes work to prepare. You can even create the whole bake a day or two in advance. Which means any person who can operate an oven can finish the dish when you want to eat it.

Gnocchi is a kind of pasta made from potatoes, which gives them a great chewy texture. I like making this pasta myself, but this dish is my “go to” when I want an easy meal.

If you have little oven dishes. You could also make individual servings.

I like to serve a green salad with this dish for some extra veg.

Gnocchi bake (3 portions)

  • 500 grams of gnocchi (1 pack)
  • 400 grams of my no fuss tomato sauce
  • 100 grams of cheese, pick your favorite melting cheese: grated Dutch cheese, cubes of blue cheese and/or mozzerella
  1. Boil the gnocchi for a couple of minutes, your gnocchi is cooked when it floats on the surface.
  2. Strain the gnocchi and rinse with cold water to stop the cooking process.
  3. Mix the gnocchi and tomato sauce.
  4. Top with cheese.
  5. Now your bake is ready for the oven, or for your fridge.
  6. Bake in the oven at 220 degrees C for 30 minutes or until bubbly and golden.

Find more oven bakes here or more Italian dishes.

Quick and easy mini veggi pizza

This is not a recipe for real pizza (Read more about pizza dough and pizza toppings). These mini pizza are delicious glutenfree vegetable bites. My son loves making these and having them for dinner. But they would also make a great party treat or be part of a great high tea.MiniPizza2

Once you have sliced your ingredients, you can assemble these mini pizzas with your toddler.

MiniPizza3

Mini veggi pizza’s

  • Eggplant/aubergine in 5 mm slices
  • 1 cup of my no fuss Tomato sauce / or a jar of ready made sauce
  • 1 cup of grated Parmesan
  • 1 mozzarella cheese ball in slices
  • 1 tomato in small cubes
  • optional: 1 onion in small cubes
  • Oregano

Lay your eggplant slices on a baking sheet. Spoon a small spoon of sauce on each slice. Sprinkle with some oregano, then add your tomato and union. Sprinkle with Parmesan and top with a small slice of mozzarella.

Bake in a 220 degrees C oven for 15 minutes and enjoy!

MiniPizza4

We tried this recipe with courgette as well, this worked fine but we just love eggplant more.

Read more about cooking with toddlers here.

No fuss tomato sauce

PastaSauceThis is the easiest way to make tomato sauce ever! You make it with fresh ingredients and the flavor is so intense. The bog secret is that the ingredients are not fried but roasted. You can use this sauce with your pasta or as a pizza sauce. Both my son and my husband have approved this recipe, it is finger licking good!

This recipe is enough for a family pasta meal. But you could easily make a large batch and freeze the rest of the sauce. The sauce can also keep in the fridge in a jar for a week.

TPasta2

No fuss tomato sauce

  • 6 tomatoes
  • 1 onion
  • 1 handfull of fresh thyme and rosemary
  • 1 tbsp dried oregano
  • Honey
  • Olive oil
  • Optional: 1 chili pepper for a kick
  • Salt and pepper to taste
  1. Preheat the oven at 220 degrees C.
  2. Halve all the tomatoes and place them sliced side up on a baking tray.
  3. Peel and quarter the onion and peel the garlic. (Slice the chili in chunky pieces.)
  4. Scatter the other ingredients between the unions.
  5. Sprinkle the tomatoes, onions, garlic and chili with thyme and rosemary.
  6. Drizzle with honey and oil
  7. Bake in the oven for 30 minutes to an hour, untill your ingredients are nicely roasted.
    If you are making this in advance, shutdown your oven and let it cool while leaving the tomatoes in.
  8. Blend the roasted ingredients to a smooth paste.
  9. Mix in the oregano, salt and pepper to taste.

Simpel starters : Bruschetta

bruchetta

We love eating dinner al fresco. But not every food is equally appropriate for this. This snack makes perfect finger food with a glass of wine in your sunny garden.

Combined with a pasta salad and some veggies it makes a lovely summer meal or a great starter at a barbecue.

You can make the garlic oil by simply finely slicing the garlic and covering it with olive oil. After half an hour the oil will have a lovely garlic flavor. You can keep this oil for a few days.

Rockin Bruschetta (about 12 servings)

  • 1 jar of Rockin Rocket pesto
  • 12 slices of mozzarella
  • Cherry tomatoes in different colors
  • Slices of old bread
  • Garlic olive oil
  • Olive oil
  • Balsamic vinegar

bruchetta1

Brush the bread slices with the garlic oil, then grill or toast them. Season the slices generously with salt and pepper while they cool. I quartered all bread slices to create the right bruschetta size.

Halve the tomatoes, dress them with a drizzle of olive oil and balsamic vinegar. Season the tomatoes and toss to dress them.

Spread the Rockin Rocket pesto on each slice. Layer the mozzerella and a few tomatoes on each slice. Take your bruschetta and enjoy.

Rockin Rocket Pesto

rrpIf you ever tried growing rocket (or arugula) you know it grows like a weed. You can eat these lovely leaves every day once your rocket plants get going.

In Holland you find them in the wild too. They grow on sandy soil, so you find them in the dunes, next to rail roads and just on side walks.

If you are lucky enough to have an abundance of rocket, you might be looking for a new way to use it up. I like to do this by making my own pesto.

This recipe has no exact quantities, I suggest going with your instincts, and go by what you have in your fridge and adding ingredients to your taste.

Rocket_Pesto

Rockin Rocket Pesto

  • 1 – 2 handfulls of rocket
  • 1 handful of cashews (or hazelnuts, walnuts, peanuts, whatever nut you like)
  • a piece of hard cheese
  • 1 clove of garlic
  • 1 – 2 tbsp of lemon juice
  • 2 tbsp olive oil
  • Salt and pepper to taste

I grind and mix my ingredients in my trusty little blender. Make sure you have enough oil in the blender.

Store your pesto in a jar or container in the fridge. Keep a layer of oil on top of your pesto to keep it fresh. Eat it within a week, but for us this is not a challenge!

This pesto is lovely as a dip with some home made bread, on your (meat) sandwich or through your pasta. If you add some more oil and lemon juice, it makes a lovely dressing for your tomatoes and mozzarella salad.

RocketPesto_Salad


This recipe works with basil or fenil tops too.

Pizza Angry Monkey

AngryPizza2My husband named this pizza and it is his idea of food heaven. You can make this pizza using the dough I described in the Perfect Pizza Peluzza. Angry is a reference to the chilies used in this pizza, giving it a kick. And monkey is a reference to the primal state your husband will be in while he waits for this pizza.

Please remember not to put to many ingredients on your pizza, it should be a thin slice of goodness that cooks in a short amount of time. This recipe is for 1 pizza, feel free to make many more and discover your own favorite pizza.

Pizza Angry Monkey

  • Pizza doughAngryIngredients
  • 1 cup of tinned, diced tomatoes
  • grated cheese (I use Gouda because I’m dutch, but any hard neutral cheese would do)
  • 3-5 slices of mozzarella
  • 3-5 slices of tomato
  • 1 tbsp oregano
  • 5 sliced button mushrooms
  • half an onion in rings
  • 3-5 slices of salami
  • 2 chilies (jalapeno or regular red chilies) in rings
  • 1 finely sliced garlic clove
  • 3 tbsp olive oil

Preheat your oven to 220 degrees C. Make sure it is well and hot before placing the pizza in, as this guarantees the best crust.

Combine the olive oil and garlic and set aside for after baking.

GarlicOil

Roll out your dough to a 30 cm diameter. Prick the bottom thoroughly with a fork. This prevents the dough from puffing up under the topping, and pushing your topping of.

Place your pizza base on the oven plate. Spread the tinned tomatoes over the pizza. Generously season this sauce. Sprinkle with oregano, then with cheese.

Evenly spread out layers of Mozzarella, fresh tomatoes, mushrooms, salami, onion and chili slices.

Bake your pizza for 10 to 20 minutes. Brush your pizza crust with the garlic oil and crack fresh black pepper on top….. and enjoy!

AngrPizza2By the way, pizza’s are a great recipe to make with your toddler.


Perfect Pizza Paluzza

Thanks to a sweet friend of mine, I am the proud owner of the Italian cooking bible “the silver spoon”. The book itself ways several kilo’s, but is worth all the shelf space it occupies in my book cupboard.

My Italian cooking bible

What you notice when you leaf through this book is how delightfully simple the Italian cuisine really is. Few ingredients are used to make the star of the show shine. I would recommend this book to any starting home cook.

One of my favorite recipes from “The silver spoon” is pizza. I use the recipe for making pizza dough but for the toppings I let my guests decide. I knead the pizza dough the evening before. I let the dough proof in the fridge. This means that making the pizza’s takes little time on the day itself.

My toddler loves pizza. From the moment we bought his kitchen stool he has been joining me to “help” with my cooking. And pizza is the perfect opportunity for this because:

  • Your toddler can help you knead the dough. Simply give your toddler a small portion of the dough and continue kneading together. My son loves pushing his fingers or fists into the dough! Simply combine the dough every now and then, and give your toddler a new ball to knead.
  • Your toddler can help dusting your work top and roll out the dough. At this point in time my toddler runs to the kitchen  cabinet container a big and a small rolling pin. My toddler is so experienced now (3 years old), that he rolls out a pizza all by himself, but you might wanna help a bit the first few times.
  • Your toddler can prick holes in the pizza with a fork.
  • Your toddler can sprinkle cheese, oregano and veg on his own pizza.

pizza

My son is always extremely proud of his creation and walks to the oven to check on his pizza regularly. Both dad and son are big pizza lovers.

Pizza dough (for 2 adults and 1 toddler)

  • 500 gram plain flower and extra for dusting
  • 7 gram instant yeast
  • 1 1/2 tsp salt
  • 240 ml lukewarm water
  • Olive oil

Mix your flower, water, salt and yeast together. Cover the mixture with a kitchen towel and let this mixture stand for 10 minutes (you can skip this step, but I promiss you it makes the kneading easier.

Knead your dough for a minimum of 10 minutes. Time your kneading, it will seam like forever the first time, but after 10 minutes you will have that smooth, elastic stuff people like to rave about.

tip: knead your dough on a table top, not your kitchen counter. This lower surface makes it possible for you to use your body weight when pushing into the dough to stretch it.

Make sure your dough is covered in oil to protect it from sticking and place it in a large container. The dough (at least) will double in size. Make sure you prevent your dough from drying out by applying an air tight lid or use kling film. Now you have two choices: let your dough proof in the fridge for up to 24 hours, or proof it at room temperature for 1 hour.

pizza2

When you want to make your pizza, take the dough out of the fridge, knock it back and let it get to room temperature for at least 30 minutes. Now you can devide your dough into 2 large balls and one smaller ball. Protect your dough by covering it with a (damp) kitchen towel until you roll out your pizza.

Roll out your dough to form your pizza. Prick holes with a fork where the topping goes.

Place your toppings on your pizza and bake for 10 to 20 minutes at 220 degrees.

I will blog about my husband’s favorite pizza some other day.