Lunch salads

Recently I descided to challenge myself and eat more healthy for lunch. What this comes down to is lots of salads! I would like to share to tasty simple salad recipes here.

Each recipe makes a tasty one person lunch or a great side dish or starter with dinner.
??????????????

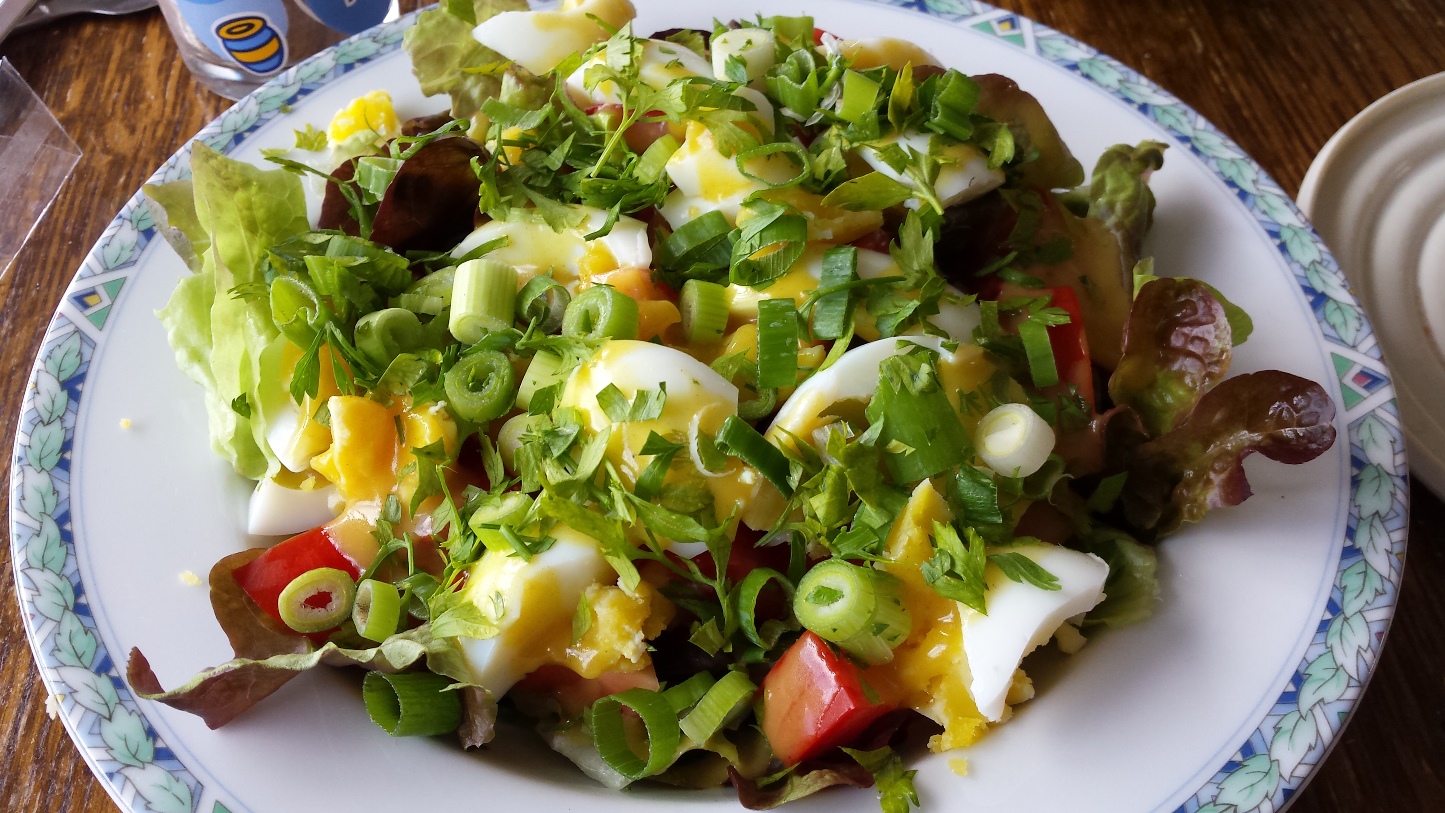
Eggy salad (1 serving)

  • 2 soft boiled eggs in wedges
  • 1 spring onion
  • 1 handfull of chopped flat leaf parsley
  • 1 tomato in cubes
  • Simple honey mustard dressing

Simple honey mustard dressing

  • 1 tbsp of dyon mustard
  • 1 tbsp of honey
  • 1 tbsp of mayo (find a recipe for making your own here)

Combine the dressing ingredients in a jam jar and shake.
??????????????

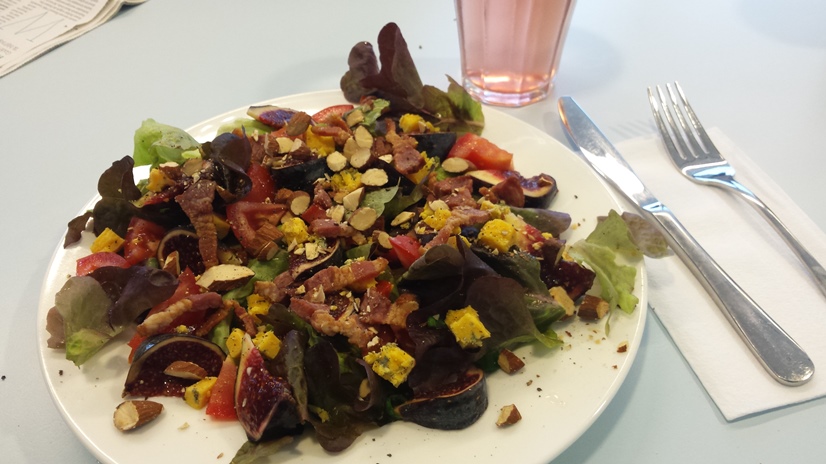
Fig and blue cheese salad (1 serving)

  • 2 handfuls of your favorite salad leaves
  • 1 tomato, diced
  • 1 handful of fried bacon cubes
  • 1 handfil of chopped nuts (I used almonds here but walnuts or pecans would be perfect!)
  • 2 fresh figs in wedges
  • 1 hanful of crumbly blue cheese
  • Drizzle with olive oil and a good balsamic vinegar
  • Sprinkle with sea salt and freshly crushed black pepper

Read more about salads here.
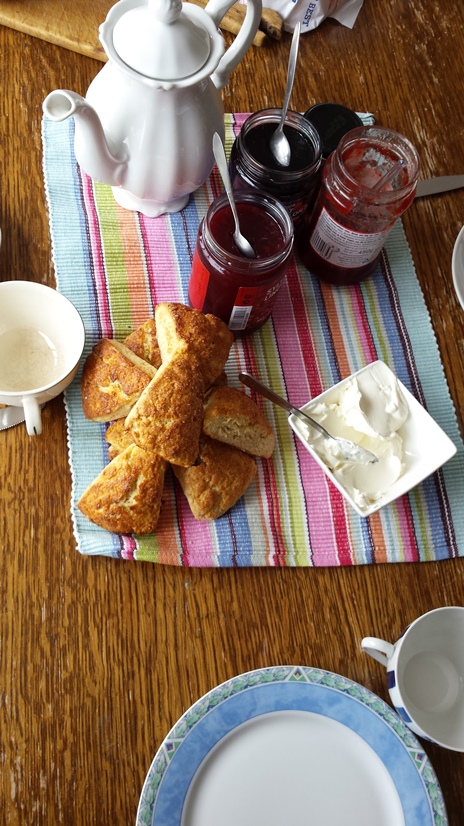
 

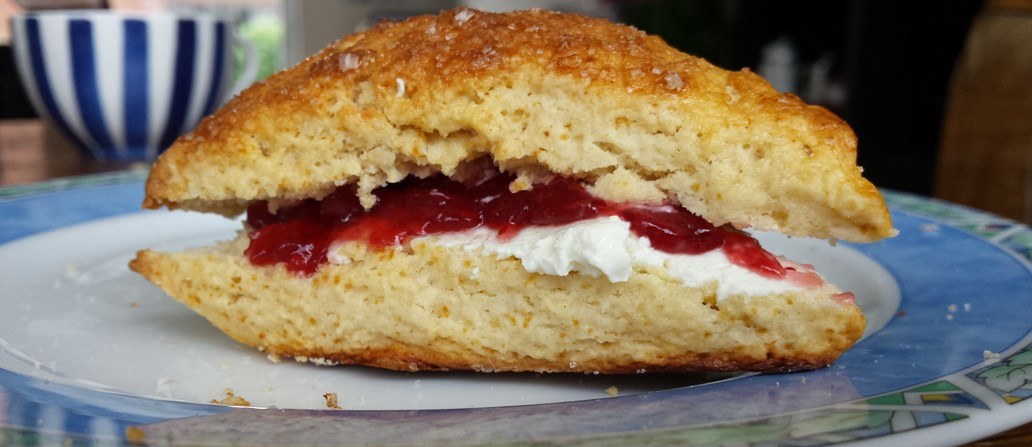
Simple jummy scones

We love having cream tea on a rainy sunday afternoon. Nothing tastes better than home made scones! I recently discovered a great secret making scones an even more attractive recipe. The scones puff up more when you rest the dough in the fridge for a couple of hours.

This means you can make the dough an evening in advance, take it out of the fridge, make scone shapes and place them in your oven. Now just enjoy those lovely scents filling your house as you make tea and take out your favorite jams and fresh fruit!

Scone2

Scones (8 – 10)

  • 225 grams plain white flour
  • 1 tsp baking powder
  • pinch salt
  • 25 grams caster sugar
  • 50 grams butter at room temperature
  • 150 ml buttermilk (optional: add some vanilla essence to the buttermilk)
  • 1 egg, beaten, or coffee cream, for brushing or dusting
  1. Mix the flour, baking powder, sugar and salt.
  2. Rub your butter in the flour mixture untill you have a bread crumb consistency.
  3. Stir in the buttermilk combine your dough into a ball.
    This is the kind of dough you want to handle as little as possible.
  4. Wrap your dough in kling film and let it rest in your fridge from 1 hour to 24 hours. Whatever works with your schedule. This does enable you to plan ahead if you are making an elaborate high tea.
  5. Preheat your oven at 220 degrees C.
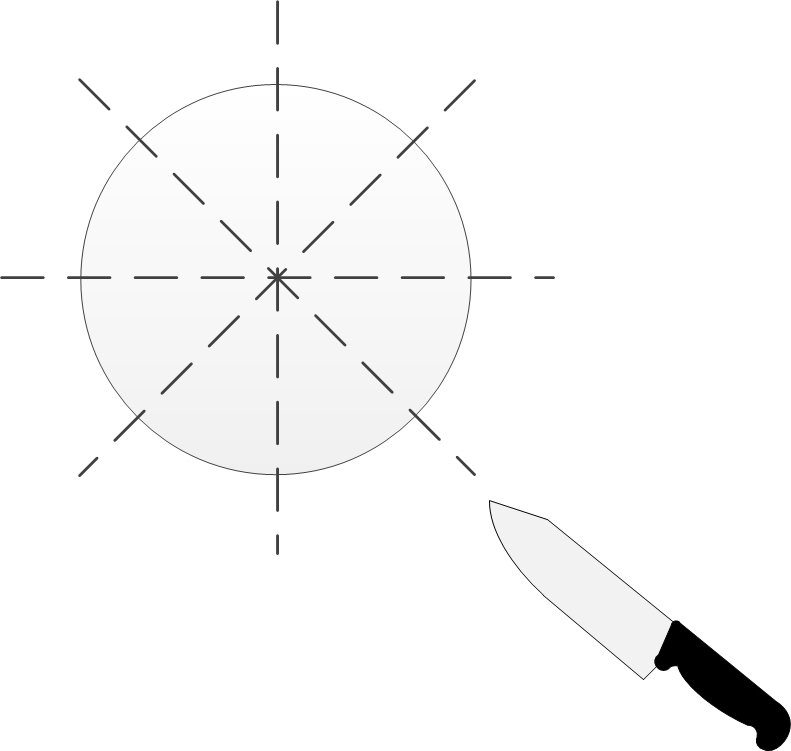
  6. Roll out your dough on a floured surface. I like to make a circular disk, about 1,5 cm thick and slice 8 scones with a sharp knife as shown in the picture.
    CuttingScones
  7. Place your scones on a baking tray lined with baking parchment.
  8. For golden and glossy scones, brush your scones with egg or coffee cream.
    You can sprinkle your scones with sugar for a crusty top.
  9. Bake your scones for 15 to twenty minutes or untill they are puffed up and golden brown.

Let your scones cool for at least ten minutes before digging in. This may be the hardest part of the recipe!

Scone

Fabulous five: jam jar re-use tips

As a mother that works 36 hours a week I like to think ahead. Making soups or sauces in the evenings, ready to warm up for dinner the next day, is a real time saver. I like serving homemade food, and by storing my creations properly I can feed my troops quickly.

Once my homemade food is packaged in a smart way, it can also be taken to work or on a picnic on the beach or in the park. This prevents us from buying greasy snacks, although we give in to our cravings every niw and then!

People often ask me how I manage this, upcycling jars is a big part of the answer. Here are my five ideas for storing and transporting in jam jars:

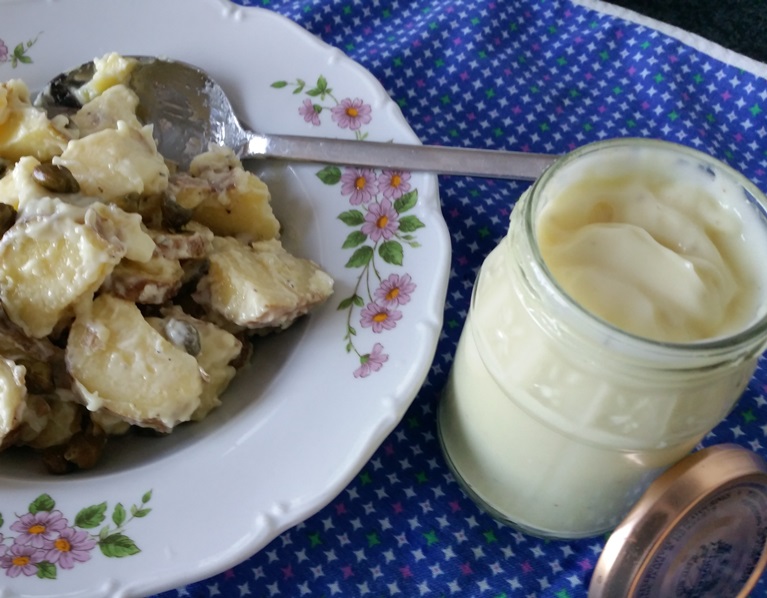
  1. Use jars  to store your home made jams, jelly’s, lemon curd or mayo.Mayo1
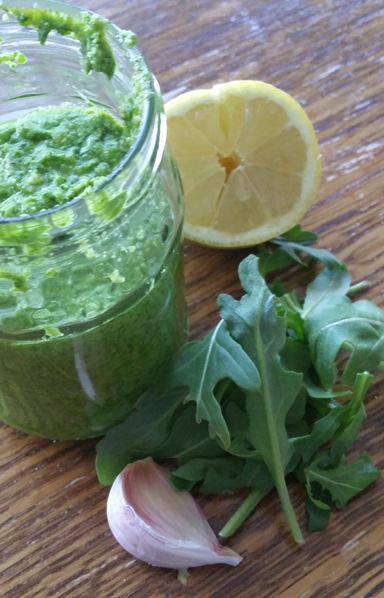
  2. Make and store batches of delicious sauces and dips in the barbecue season like tzatziki, rocket pesto and tomato sauce. RocketPesto2
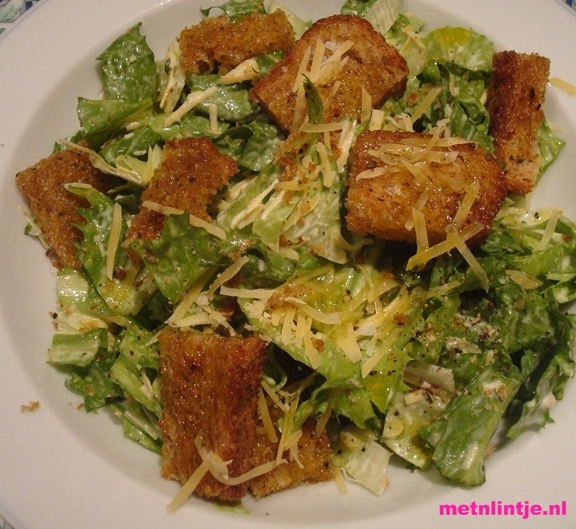
  3. Mix your favorite salad dressing inside a jar. Just add all ingredients, close and shake! I like making our Ceasar salad dressing this way.
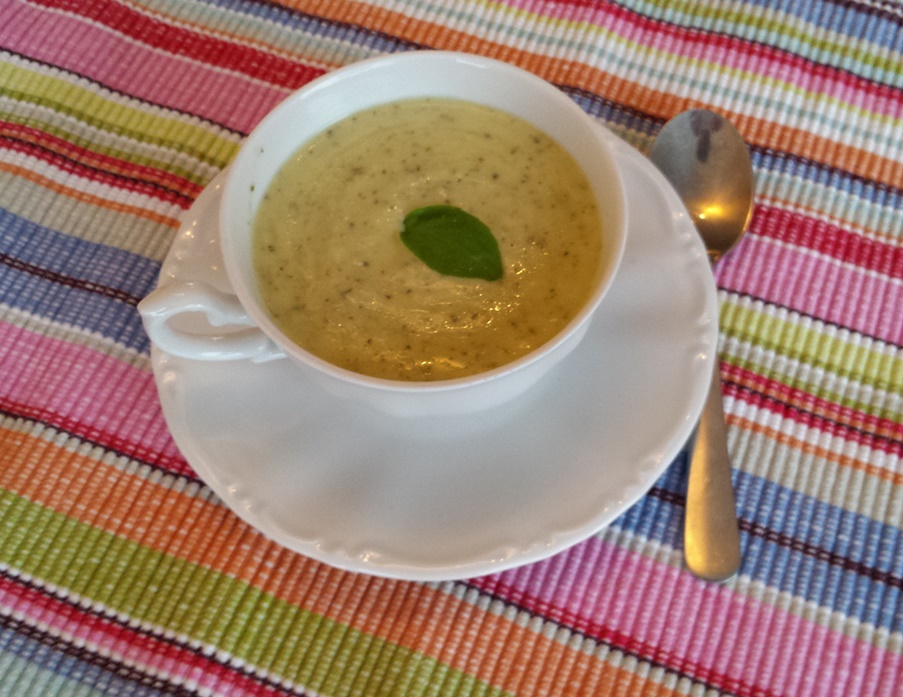
  4. CeaserOne jam jar holds 1 (cold) soup serving, for a healthy lunch or afternoon snack! (like this my gourgette soup recipe, good warm or cold)Gsoup2
  5. Label your jars! This way you know what’s in them and when you made them. I use pretty labels when I plan on giving the jam away. That brings me to another perk of using a jar, unlike an (expensive) plastic container, I never worry about getting the container back from my friends….

My mighty Moussaka

One of my favorite restaurants to visit is a Greek restaurant. I love the Mediterranean spices, and the hint of the orient. It is one of the few types of restaurant where I can choose tasty freshly grilled meats as well as seafood, or a jummy slow cooked lamb stew. I am also partial to their yummy yoghurt sauce, tzatziki!

I have always loved Greece’s answer to the lasagna: the moussaka! Recently it occurred to me that I could easily turn this recipe into a vegetarian dish. My meat loving husband was nearly finished with his dinner when he realized there was no meat in his food. He had enjoyed the texture and flavor too much to notice what was missing.

On the practical side of things, this recipe has plenty of upsides too. I made the actual dish a day in advance. The next day I baked the moussaka, which made for a nice fuss free evening for me and my toddler. This dish will definitely be on a family favorite list for a while.

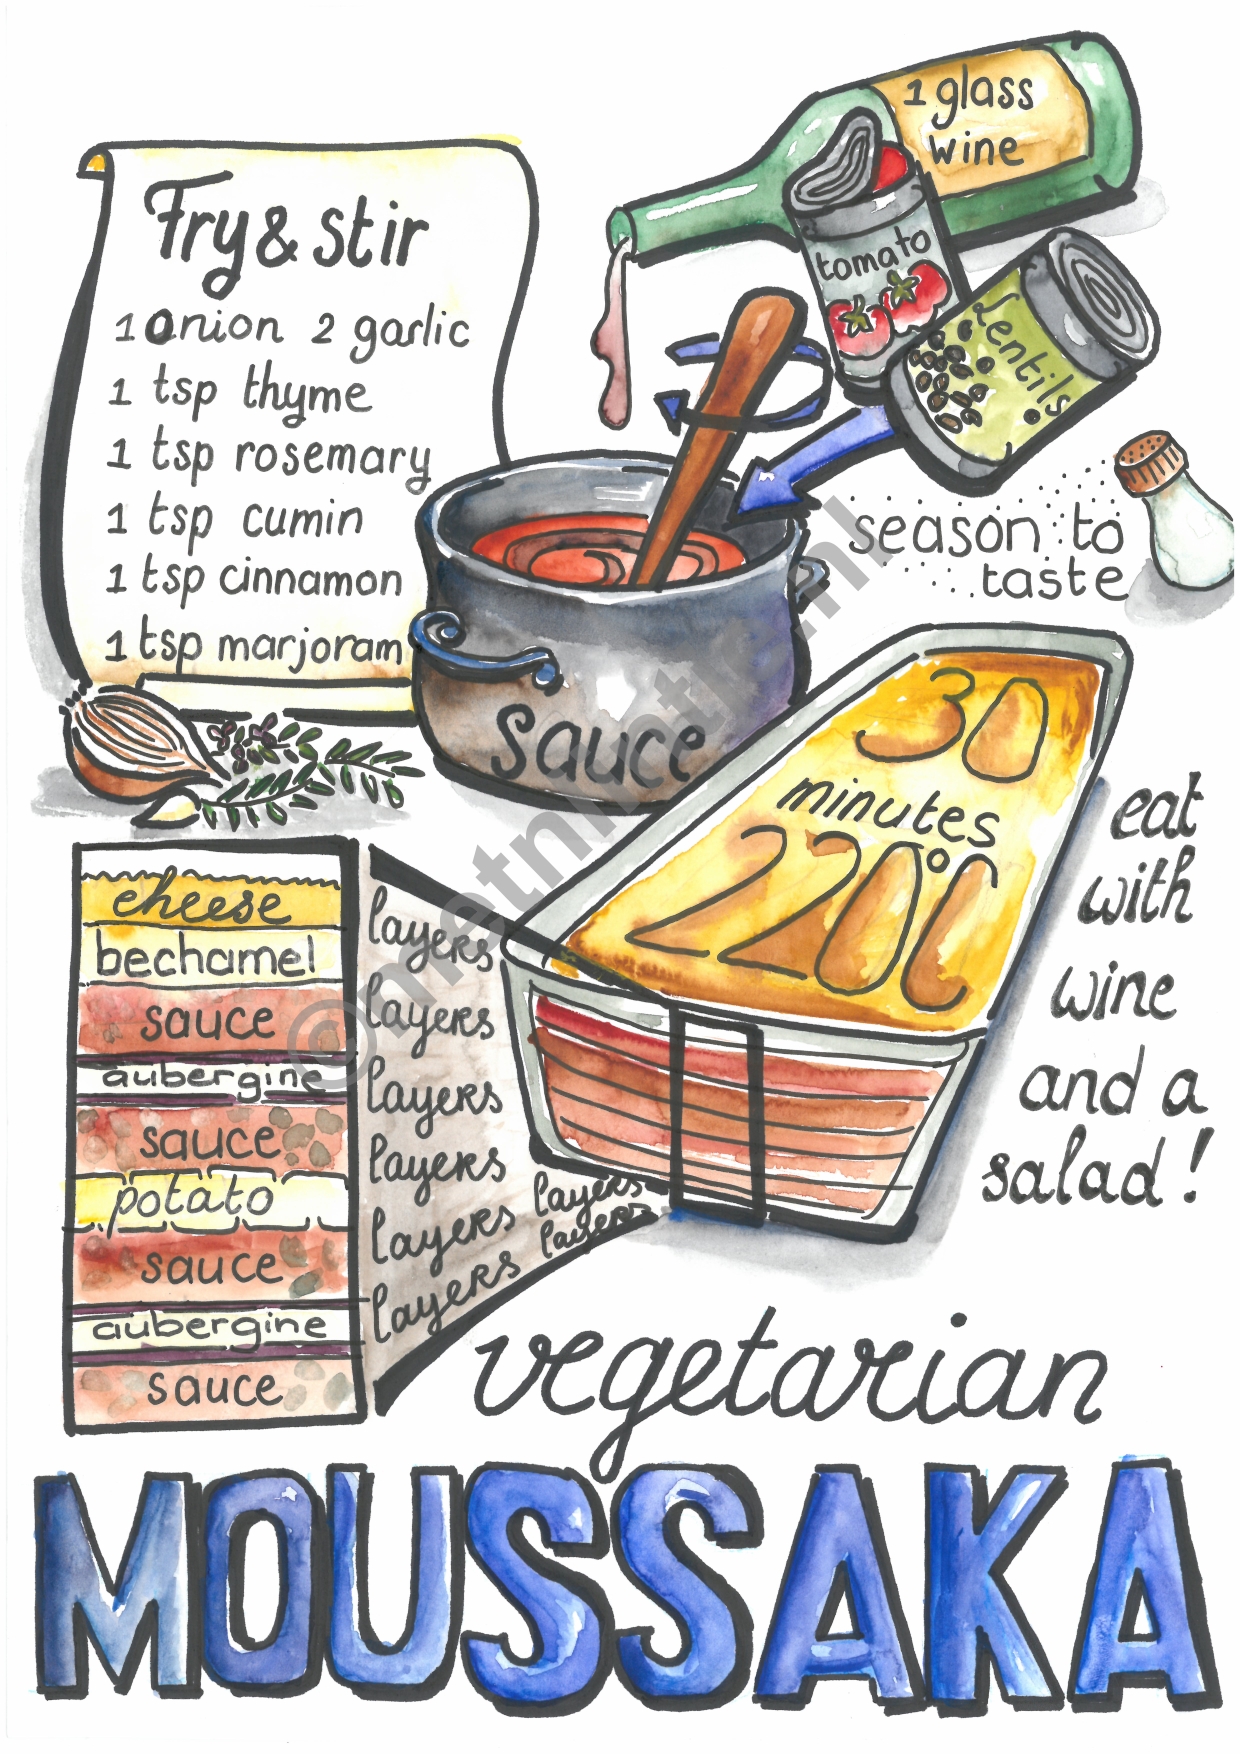
MoussakaSketchWatermark

Moussaka

  • Sauce:
    • 1 tin of depuy lentils ( 310 gram )
    • 1 tin of diced tomatoes ( 400 gram )
    • 1 tsp cumin
    • 2 tsp thyme
    • 1 tsp oregano
    • 1 tsp mint
    • 1 tsp sweet smoked paprika
    • 1 tsp cinnamon
    • 3 tbsp of olive oil
    • 1 large union, diced
    • 2 cloves of garlic, finely sliced
    • 1 glass of white wine
    • Half cube of vegetable stock
  • 1 aubergine in slices
  • 3 medium large potatoes
  • Topping (you substitute this with bechamel sauce, this is my lazy cheat version):
    • 2 tbsp cream cheese
    • 1 tub of cottage cheese ( 200 gram )
  • 150 gram of grated cheese

You will need an ovenproof dish, I used one of  27 by 18 cm.

  1. Before you do anything else. Boil your potatoes until they are soft.
  2. Prepare the sauce;
    • Fry your union in some olive oil until soft.
    • Stir in the garlic, paprika, cumin and thyme. Add the wine and let it simmer for a few minutes.
    • Stir in the rest of the sauce ingredients.
    • Bring the sauce to a light simmer. Leave it to simmer for about an hour.
  3. While the sauce is simmering, prepare your other ingredients;
    • Slice the aubergine length ways. Drizzle the slices with olive oil and generously season with salt and pepper. Fry the slices in a griddle pan on each side.
    • Let your potatoes cool, then slice them.
    • Wilt the spinach down in some oil in a really hot pan. Let the spinach cool and slice it roughly. The spinach needs to cool in a collinder now. Drain as much of moisture out as you possibly can.
    • Mix your topping ingredients.
  4. When all your components are ready, you can layer your moussaka in an oven proof dish:
    • One layer of sauce
    • One layer of spinach
    • One layer of potatoe slices, don’t forget to season these.
    • One layer of sauce
    • One layer of aubergine
    • Spread out your topping
    • Sprinkle with the grated cheese
    • Season with some freshly ground pepper
  5. (You can keep the dish overnight before this step) Bake the moussaka in a 220 degree C oven for about 30 minutes until bubbly and golden.
  6. Let your moussaka stand for 5 minutes before serving.

Easiest healthy cookies ever!

I love looking for inspiration on Pinterest. This time I ran into a 3 ingredient cookie recipe. This inspired me as it also contained no sugar and they looked delicious, find my inspiration here.

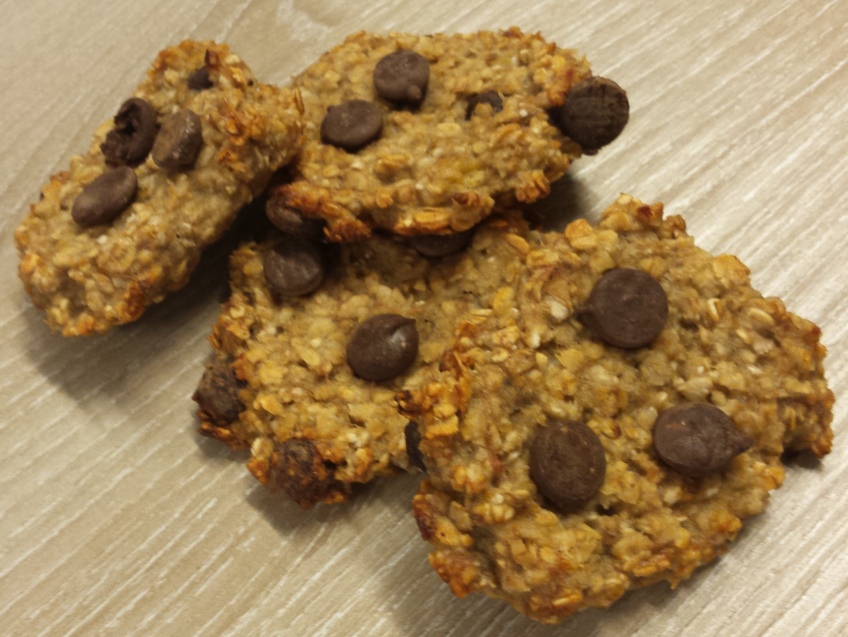
The cookies were easy to make. They are best eaten right away, or within 24 hours. This would not be a problem in my home! It is a great way to make use of that overripe banana. The riper your banana gets, the sweeter your cookies will be.

These cookies make a great healthy snack for the entire family. They could even be used as a breakfast cookie along with a smoothy or a tall glass of milk. I tested my cookies on my toddler and my colleagues. They were all amazed at how delicious they were without added sugar.

Koek2

This simple recipe would also be a great recipe for children to make with very little help from you!

3 ingredient cookies

  • 1 overripe banana
  • 2 handfulls of quick oats
  • 2 handfulls of chocalate chips
  • Optional: dried fruit and/or nuts

Mash up your banana and mix your ingredients. Spoon your cookies on a baking sheet. I made 6 smaller cookies, but you could make 3 larger cookies as well.

Bake your cookies in a preheated oven for 20 minutes at 180 degrees C and enjoy!

Find more tips for cooking with toddlers.

My new discovery: Yvette van Boven

I have finally discovered a Dutch cooking diva!

For years I have been watching great British cooking television, especially Saturday Kitchen. I always wondered why I could never find Dutch cooking shows to watch and love.

The passion for fresh ingredients, their sincerity and their inspiring amount of knowledge meant that I fell in love with many TV chefs like Jamie Oliver, Nigella, James Martin and Paul Hollywood. Now that the Great British Bake Off is on, I just started baking again. It is safe to say that the BBC has a large influence on the food I cook.

Since August 17th Yvette van Boven has her own cooking series on Dutch public television, marking a significant event in Dutch TV history.

This is a lady that can inspire the masses! Both the experienced cook and the beginner can learn from her show. She gives you confidence by making cooking look easy, she inspires you to use every resource and she makes me feel extremely hungry.

Yvette strikes the delicate balance between being green and ecological while keeping it affordable and practical. She shows you how to make showstoppers like homemade Cherry beer without making it endlessly complicated.

Some of my favorite recipe’s so far are:

Corn muffins

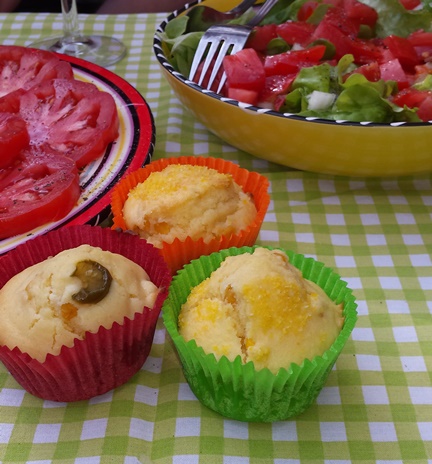
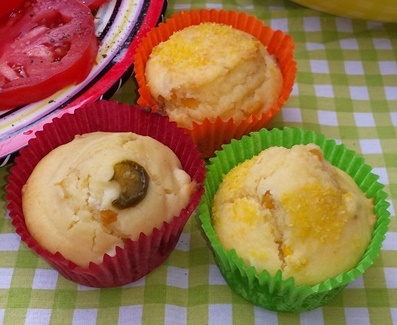
CornMuffin2These corn muffins make a great side dish with Mexican food or a barbecue. I first made these when I was looking for a side dish with  a chillli that I could make a day in advance. They are silky and soft. These muffins don’t dry out too quickly. They are great with a generous helping of butter or dipped in a hearty chilli sauce.

Corn muffins (10 muffins)

  • 125 grams of plain flour
  • 75 grams of corn flour
  • 1 tsp salt
  • 1 tsp baking powder
  • 20 grams of sugar
  • 175 ml of butter milk (or regular milk)
  • 1 egg
  • 35 grams of butter
  • 1 cup of corn kernels
  • Optional: handful of semolina for the crunchy top
  • Optional, for extra filling:
    • Fried onion rings
    • Slices of jalapeno peppers

Preheat your oven at 200 degrees C.

Mix and combine your dry ingredients. Mix and combine your wet ingredients. Combine all your ingredients.

Divide the batter over the muffin tins. Place the filling in the middle of the muffins. Sprinkle each muffin with some semolina for a crunchy top.

Cornmuffin4

I like to hint at the filling by placing a pepper or onion ring on the top. This prevents my toddler from eating a spicy muffin.

Bake your muffins for 20 minutes or until risen and golden.

These muffins taste great warm but they also keep or freeze very well.

Read about more BBQ favorites here.

Simpel starters: salmon salad

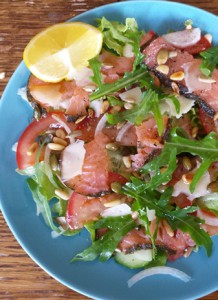
Salmonsalad2This salad is a great way to make the most of slices of smoked salmon. This salad is inspired on carpaccio. It is an easy way to impress your guests without too much fuss. If you buy good quality salmon, you just need to bring the ingredients together to create a beautiful harmony of flavors and textures.
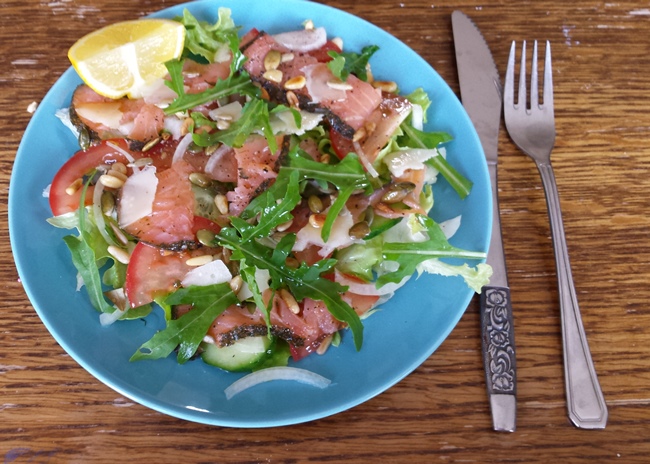
I like making 4 individual servings, but if you want you can make a large serving platter.

Salmon salad (4 servings)

  • 200 grams smoked salmon
  • 2 handfuls of your favorite lettuce leaves
  • 1 (spring) onion finely sliced
  • 1 handful of pine nuts
  • olive oil
  • 1 lemon. Use half for dressing the salad and cut the rest in wedges for presentation.
  • parmesian
  • Optional: sliced tomato and cucumber

Salmonsalad3

After slicing your ingredients, assemble your salad. Dress your leaves with olive oil and lemon juice and divide them over the plates. Spread your ingredients over the leaves. Finish with an extra drizzle of olive oil, freshly ground black pepper and a sprinkling of sea salt.

This salad also works great with slices of fresh tuna.

My Best Brownies

There are so many brownie recipes. I have tried so many recipes, for me this recipe’s gives me the best brownies. Slightly dense and moist in the middle, a crunchy top and appropriately chewy.

Best Brownies (makes 18 brownies)

For the batter:

  • 100 grams of dark chocolate in chunks
  • 150 grams of butter
  • 4 eggs
  • 200 grams of sugar
  • 1 tsp vanilla essence
  • 100 grams of flour
  • 55 grams coco powder
  • 1 pinch of salt

Optional filling

  • 70 grams chopped almonds, walnuts, hazelnuts and/or peanuts
  • 70 grams of chocolate, whichever you prefer
  • Alternatively you can mix in chuncks of your favorite candy bar (I like Snickers, but any other chocolate candy bar could work)

Every recipe calls for a different order for mixing the ingredients. In my experience it doesn’t really matter how you combine the ingredients, just make sure you don’t cook the eggs with the hot melted chocolate.

  1. Preheat your oven at 190 degrees C.
  2. Melt your chocolate and butter above simmering water.
  3. Line your baking tin (I use a  rectangular 15 cm by 30 cm baking tin).
  4. Take your melted chocolate of the heat, let it cool for a few minutes.
  5. Mix in the vanilla essence, sugar, this lowers the temperature of the chocolate a little more.
  6. Combine with the eggs, flour, salt and coco powder.
  7. Stir in the optional filling.
  8. Pour the batter in the baking tin and bake for 30 to 40 minutes.

Your cooking time depends on how dense you like your  brownies. Sometimes I slightly undercook my brownies. This way I can warm them up later (and cook them a bit more) in the microwave and serve them warm with vanilla ice cream or clotted cream.

Quick and easy mini veggi pizza

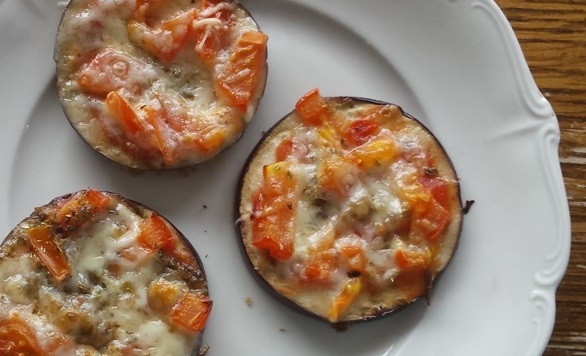
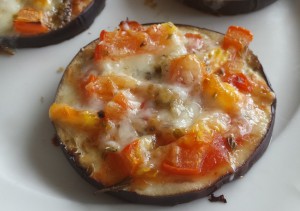
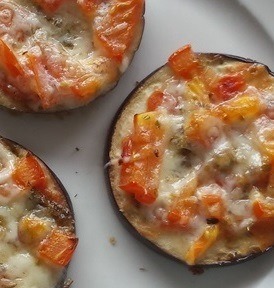
This is not a recipe for real pizza (Read more about pizza dough and pizza toppings). These mini pizza are delicious glutenfree vegetable bites. My son loves making these and having them for dinner. But they would also make a great party treat or be part of a great high tea.MiniPizza2

Once you have sliced your ingredients, you can assemble these mini pizzas with your toddler.

MiniPizza3

Mini veggi pizza’s

  • Eggplant/aubergine in 5 mm slices
  • 1 cup of my no fuss Tomato sauce / or a jar of ready made sauce
  • 1 cup of grated Parmesan
  • 1 mozzarella cheese ball in slices
  • 1 tomato in small cubes
  • optional: 1 onion in small cubes
  • Oregano

Lay your eggplant slices on a baking sheet. Spoon a small spoon of sauce on each slice. Sprinkle with some oregano, then add your tomato and union. Sprinkle with Parmesan and top with a small slice of mozzarella.

Bake in a 220 degrees C oven for 15 minutes and enjoy!

MiniPizza4

We tried this recipe with courgette as well, this worked fine but we just love eggplant more.

Read more about cooking with toddlers here.