Pizza Angry Monkey

AngryPizza2My husband named this pizza and it is his idea of food heaven. You can make this pizza using the dough I described in the Perfect Pizza Peluzza. Angry is a reference to the chilies used in this pizza, giving it a kick. And monkey is a reference to the primal state your husband will be in while he waits for this pizza.

Please remember not to put to many ingredients on your pizza, it should be a thin slice of goodness that cooks in a short amount of time. This recipe is for 1 pizza, feel free to make many more and discover your own favorite pizza.
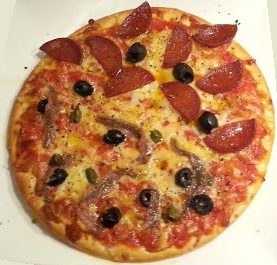
Pizza Angry Monkey

  • Pizza doughAngryIngredients
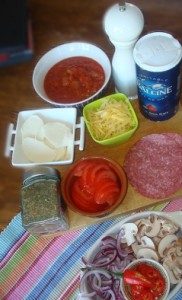
  • 1 cup of tinned, diced tomatoes
  • grated cheese (I use Gouda because I’m dutch, but any hard neutral cheese would do)
  • 3-5 slices of mozzarella
  • 3-5 slices of tomato
  • 1 tbsp oregano
  • 5 sliced button mushrooms
  • half an onion in rings
  • 3-5 slices of salami
  • 2 chilies (jalapeno or regular red chilies) in rings
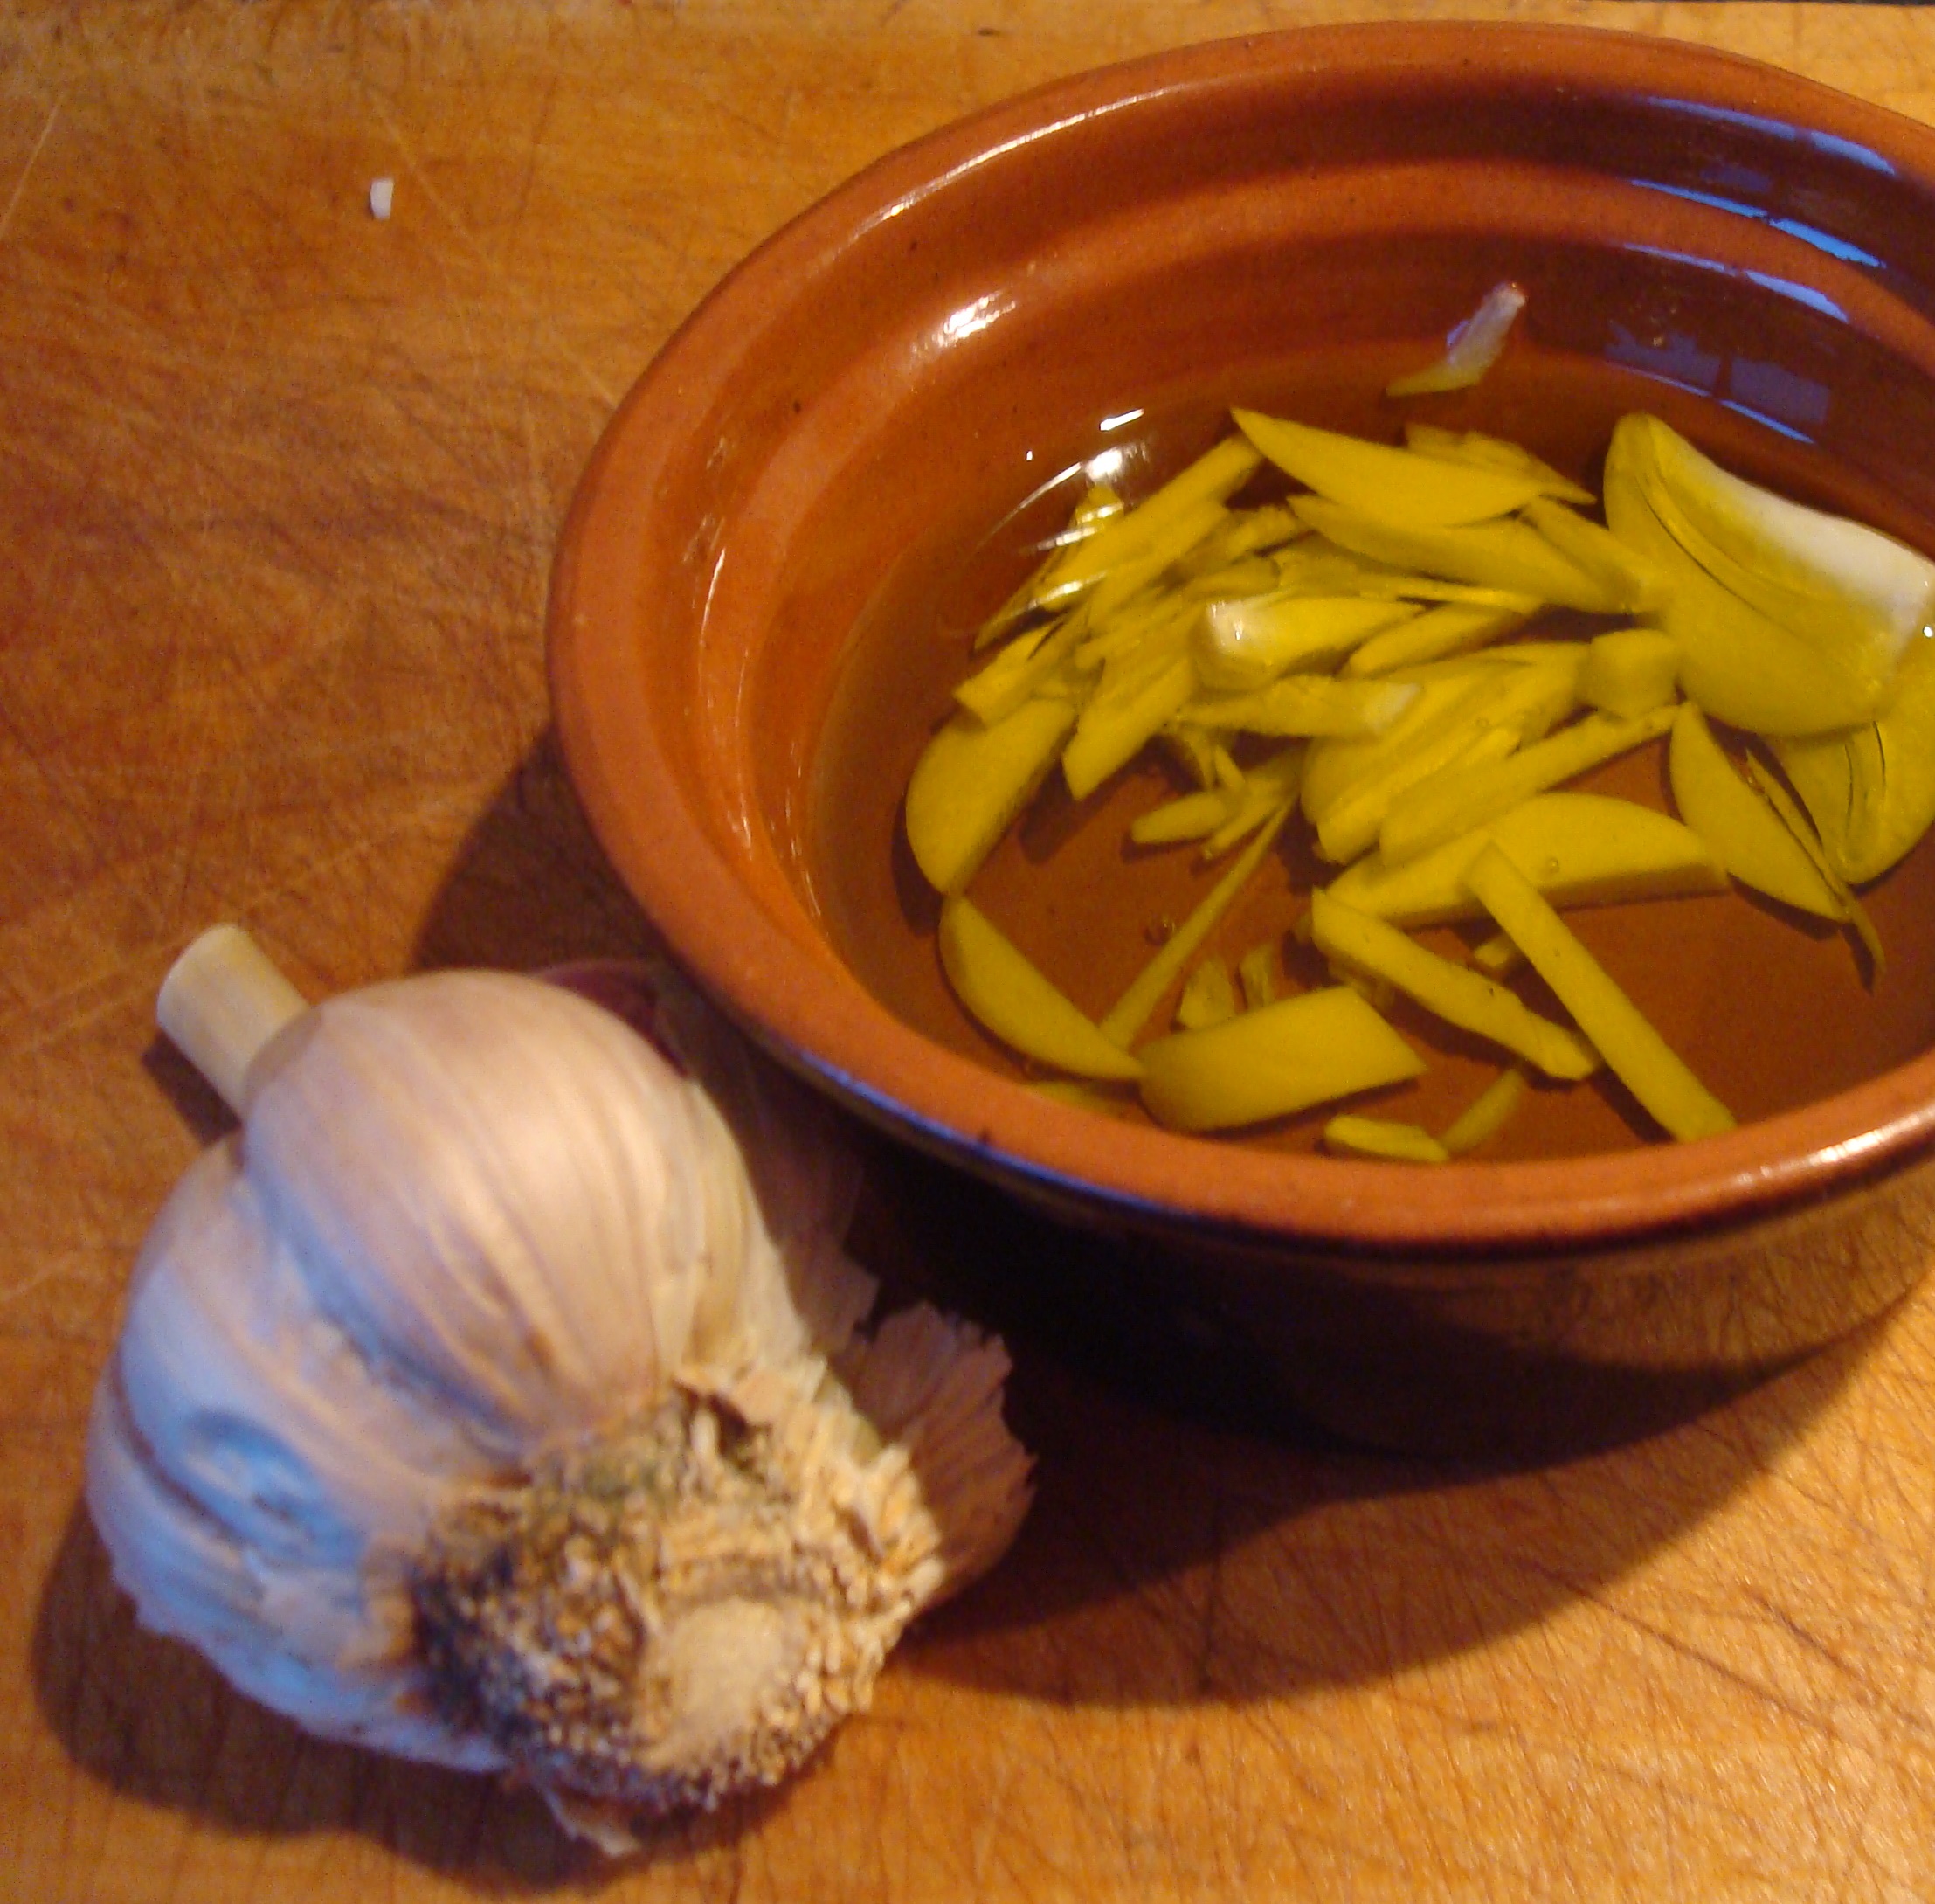
  • 1 finely sliced garlic clove
  • 3 tbsp olive oil

Preheat your oven to 220 degrees C. Make sure it is well and hot before placing the pizza in, as this guarantees the best crust.

Combine the olive oil and garlic and set aside for after baking.

GarlicOil

Roll out your dough to a 30 cm diameter. Prick the bottom thoroughly with a fork. This prevents the dough from puffing up under the topping, and pushing your topping of.

Place your pizza base on the oven plate. Spread the tinned tomatoes over the pizza. Generously season this sauce. Sprinkle with oregano, then with cheese.

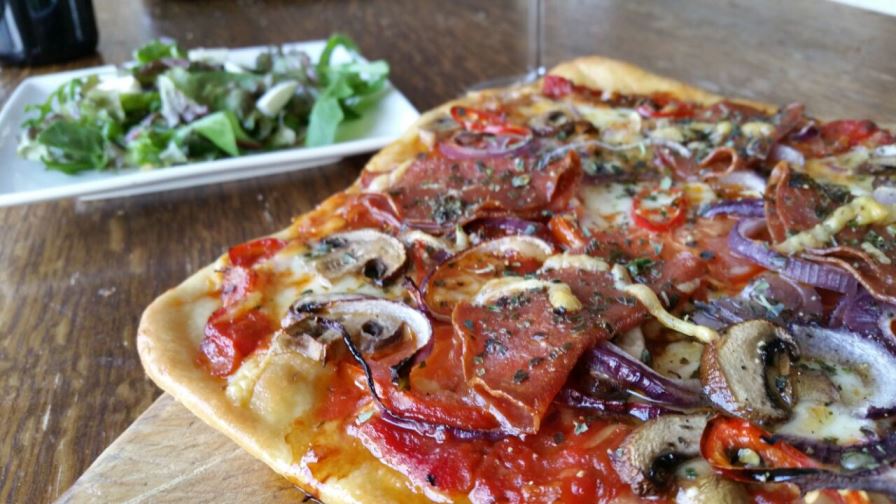
Evenly spread out layers of Mozzarella, fresh tomatoes, mushrooms, salami, onion and chili slices.

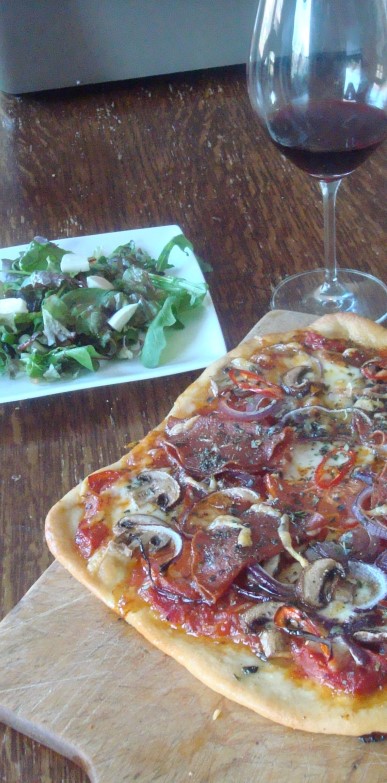
Bake your pizza for 10 to 20 minutes. Brush your pizza crust with the garlic oil and crack fresh black pepper on top….. and enjoy!

AngrPizza2
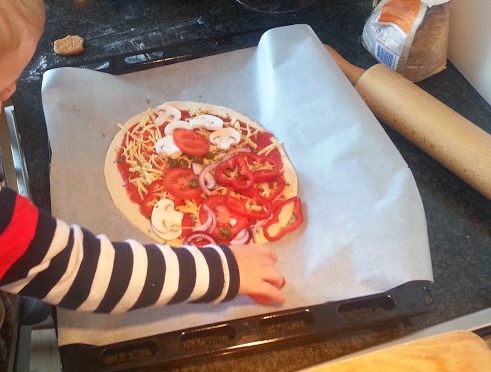
By the way, pizza’s are a great recipe to make with your toddler.


Posh Fish & Chips

SalmonMeal

The title of this blog post is misleading, this posh dinner is easy to make. All you need is an oven and some patience. The recipe describes how to make a fancy but delicious salmon in a crust and delicious sweet and salty chips. As a side dish you can mix the suggested sauce. I also recommend making a simple green salad on the side.

I think this makes a great family meal. My son loves the sweet potato chips! It also makes an impressive dish if you have guests. Make a whole piece of salmon in a crust and cut lovely slices. Baking in the crust means your salmon will be moist but cooked, so enjoy!

Fish & chips (serves 2)

  • Salmon:
    • 300 gram salmon filet
    • 4 squares of ready made puff pastry
    • 4 tbsp herbed cream cheese
    • 1 beaten egg
    • 1 tbsp sesame seeds
  • 2 sweet potatoes
  • 2 large regular potatoes
  • 2 tbsp olive oil
  • rock salt
  • Sauce:
    • 1 tsp mustard
    • 1 tbsp mayonaise
    • 3 tbsp greek yoghurt
    • 1 tsp mint
    • 1 tsp dill
  1. Take your pastry squares out of the freezer and preheat your oven to 220 degrees C.
  2. Prepare your chips:
    • Clean and peel your potatoes.
    • Slice in long strips about 1 cm thick.
    • Lightly coat them in olive oil and sprinkle with sea salt and pepper.
    • Place on a baking sheet.
    • Bake in the oven for 30 minutes, the salmon can be added after 10 minutes.

SweetSaltyChips

3. Prepare the salmon:

  • Connect the 2 dough squares.
  • Spread the cream cheese under the salmon.
  • Place the salmon filet on the cream cheese.
  • Season the salmon.
  • Make a few paralel slashes in your top dough squares.
  • Cover the salmon with the slashed squares.
  • Connect the bottom and top squares by pinching the dough together.
  • Brush the salmon package with egg.
  • Sprinkle with sesame and sea salt.

Salmon

  • After the potatoes have been in the oven for 10 minutes, you can place the salmon in the oven for 20 minutes.

This way all ingredients will be ready to eat simultaneously.

ZalmKorst

While the sweet&salty potato chips are cooking, mix your sauce ingredients and prepare your salad.

Bon apetit!

Perfect Pizza Paluzza

Thanks to a sweet friend of mine, I am the proud owner of the Italian cooking bible “the silver spoon”. The book itself ways several kilo’s, but is worth all the shelf space it occupies in my book cupboard.

My Italian cooking bible

What you notice when you leaf through this book is how delightfully simple the Italian cuisine really is. Few ingredients are used to make the star of the show shine. I would recommend this book to any starting home cook.

One of my favorite recipes from “The silver spoon” is pizza. I use the recipe for making pizza dough but for the toppings I let my guests decide. I knead the pizza dough the evening before. I let the dough proof in the fridge. This means that making the pizza’s takes little time on the day itself.

My toddler loves pizza. From the moment we bought his kitchen stool he has been joining me to “help” with my cooking. And pizza is the perfect opportunity for this because:

  • Your toddler can help you knead the dough. Simply give your toddler a small portion of the dough and continue kneading together. My son loves pushing his fingers or fists into the dough! Simply combine the dough every now and then, and give your toddler a new ball to knead.
  • Your toddler can help dusting your work top and roll out the dough. At this point in time my toddler runs to the kitchen  cabinet container a big and a small rolling pin. My toddler is so experienced now (3 years old), that he rolls out a pizza all by himself, but you might wanna help a bit the first few times.
  • Your toddler can prick holes in the pizza with a fork.
  • Your toddler can sprinkle cheese, oregano and veg on his own pizza.

pizza

My son is always extremely proud of his creation and walks to the oven to check on his pizza regularly. Both dad and son are big pizza lovers.

Pizza dough (for 2 adults and 1 toddler)

  • 500 gram plain flower and extra for dusting
  • 7 gram instant yeast
  • 1 1/2 tsp salt
  • 240 ml lukewarm water
  • Olive oil

Mix your flower, water, salt and yeast together. Cover the mixture with a kitchen towel and let this mixture stand for 10 minutes (you can skip this step, but I promiss you it makes the kneading easier.

Knead your dough for a minimum of 10 minutes. Time your kneading, it will seam like forever the first time, but after 10 minutes you will have that smooth, elastic stuff people like to rave about.

tip: knead your dough on a table top, not your kitchen counter. This lower surface makes it possible for you to use your body weight when pushing into the dough to stretch it.

Make sure your dough is covered in oil to protect it from sticking and place it in a large container. The dough (at least) will double in size. Make sure you prevent your dough from drying out by applying an air tight lid or use kling film. Now you have two choices: let your dough proof in the fridge for up to 24 hours, or proof it at room temperature for 1 hour.

pizza2

When you want to make your pizza, take the dough out of the fridge, knock it back and let it get to room temperature for at least 30 minutes. Now you can devide your dough into 2 large balls and one smaller ball. Protect your dough by covering it with a (damp) kitchen towel until you roll out your pizza.

Roll out your dough to form your pizza. Prick holes with a fork where the topping goes.

Place your toppings on your pizza and bake for 10 to 20 minutes at 220 degrees.

I will blog about my husband’s favorite pizza some other day.