Simple jummy scones

We love having cream tea on a rainy sunday afternoon. Nothing tastes better than home made scones! I recently discovered a great secret making scones an even more attractive recipe. The scones puff up more when you rest the dough in the fridge for a couple of hours.

This means you can make the dough an evening in advance, take it out of the fridge, make scone shapes and place them in your oven. Now just enjoy those lovely scents filling your house as you make tea and take out your favorite jams and fresh fruit!

Scone2

Scones (8 – 10)

  • 225 grams plain white flour
  • 1 tsp baking powder
  • pinch salt
  • 25 grams caster sugar
  • 50 grams butter at room temperature
  • 150 ml buttermilk (optional: add some vanilla essence to the buttermilk)
  • 1 egg, beaten, or coffee cream, for brushing or dusting
  1. Mix the flour, baking powder, sugar and salt.
  2. Rub your butter in the flour mixture untill you have a bread crumb consistency.
  3. Stir in the buttermilk combine your dough into a ball.
    This is the kind of dough you want to handle as little as possible.
  4. Wrap your dough in kling film and let it rest in your fridge from 1 hour to 24 hours. Whatever works with your schedule. This does enable you to plan ahead if you are making an elaborate high tea.
  5. Preheat your oven at 220 degrees C.
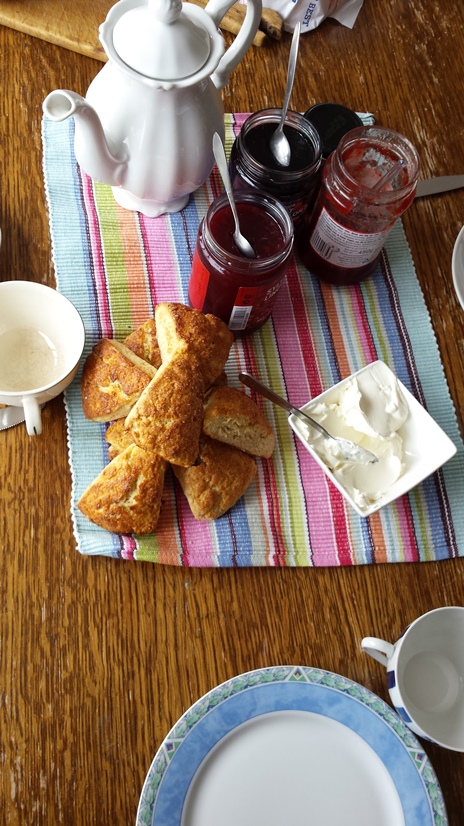
  6. Roll out your dough on a floured surface. I like to make a circular disk, about 1,5 cm thick and slice 8 scones with a sharp knife as shown in the picture.
    CuttingScones
  7. Place your scones on a baking tray lined with baking parchment.
  8. For golden and glossy scones, brush your scones with egg or coffee cream.
    You can sprinkle your scones with sugar for a crusty top.
  9. Bake your scones for 15 to twenty minutes or untill they are puffed up and golden brown.

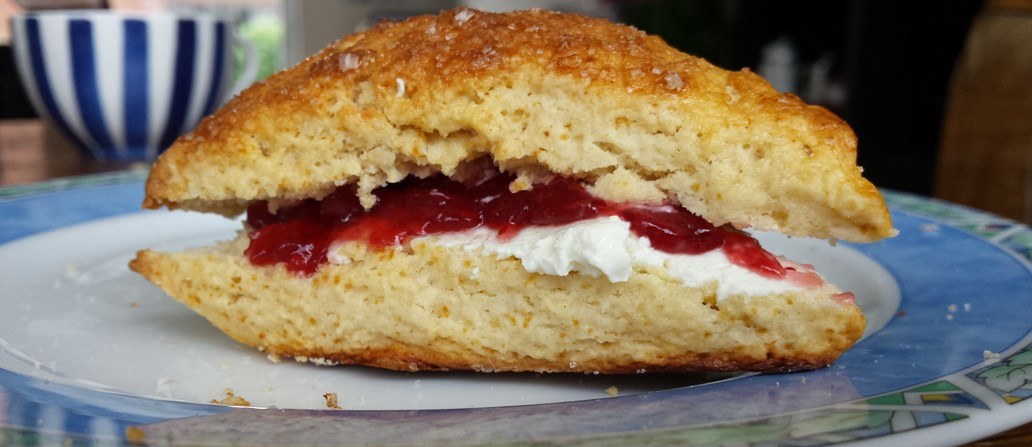
Let your scones cool for at least ten minutes before digging in. This may be the hardest part of the recipe!

Scone

Easiest healthy cookies ever!

I love looking for inspiration on Pinterest. This time I ran into a 3 ingredient cookie recipe. This inspired me as it also contained no sugar and they looked delicious, find my inspiration here.

The cookies were easy to make. They are best eaten right away, or within 24 hours. This would not be a problem in my home! It is a great way to make use of that overripe banana. The riper your banana gets, the sweeter your cookies will be.

These cookies make a great healthy snack for the entire family. They could even be used as a breakfast cookie along with a smoothy or a tall glass of milk. I tested my cookies on my toddler and my colleagues. They were all amazed at how delicious they were without added sugar.

Koek2

This simple recipe would also be a great recipe for children to make with very little help from you!

3 ingredient cookies

  • 1 overripe banana
  • 2 handfulls of quick oats
  • 2 handfulls of chocalate chips
  • Optional: dried fruit and/or nuts

Mash up your banana and mix your ingredients. Spoon your cookies on a baking sheet. I made 6 smaller cookies, but you could make 3 larger cookies as well.

Bake your cookies in a preheated oven for 20 minutes at 180 degrees C and enjoy!

Find more tips for cooking with toddlers.

My new discovery: Yvette van Boven

I have finally discovered a Dutch cooking diva!

For years I have been watching great British cooking television, especially Saturday Kitchen. I always wondered why I could never find Dutch cooking shows to watch and love.

The passion for fresh ingredients, their sincerity and their inspiring amount of knowledge meant that I fell in love with many TV chefs like Jamie Oliver, Nigella, James Martin and Paul Hollywood. Now that the Great British Bake Off is on, I just started baking again. It is safe to say that the BBC has a large influence on the food I cook.

Since August 17th Yvette van Boven has her own cooking series on Dutch public television, marking a significant event in Dutch TV history.

This is a lady that can inspire the masses! Both the experienced cook and the beginner can learn from her show. She gives you confidence by making cooking look easy, she inspires you to use every resource and she makes me feel extremely hungry.

Yvette strikes the delicate balance between being green and ecological while keeping it affordable and practical. She shows you how to make showstoppers like homemade Cherry beer without making it endlessly complicated.

Some of my favorite recipe’s so far are:

Corn muffins

CornMuffin2These corn muffins make a great side dish with Mexican food or a barbecue. I first made these when I was looking for a side dish with  a chillli that I could make a day in advance. They are silky and soft. These muffins don’t dry out too quickly. They are great with a generous helping of butter or dipped in a hearty chilli sauce.

Corn muffins (10 muffins)

  • 125 grams of plain flour
  • 75 grams of corn flour
  • 1 tsp salt
  • 1 tsp baking powder
  • 20 grams of sugar
  • 175 ml of butter milk (or regular milk)
  • 1 egg
  • 35 grams of butter
  • 1 cup of corn kernels
  • Optional: handful of semolina for the crunchy top
  • Optional, for extra filling:
    • Fried onion rings
    • Slices of jalapeno peppers

Preheat your oven at 200 degrees C.

Mix and combine your dry ingredients. Mix and combine your wet ingredients. Combine all your ingredients.

Divide the batter over the muffin tins. Place the filling in the middle of the muffins. Sprinkle each muffin with some semolina for a crunchy top.

Cornmuffin4

I like to hint at the filling by placing a pepper or onion ring on the top. This prevents my toddler from eating a spicy muffin.

Bake your muffins for 20 minutes or until risen and golden.

These muffins taste great warm but they also keep or freeze very well.

Read about more BBQ favorites here.

My Best Brownies

There are so many brownie recipes. I have tried so many recipes, for me this recipe’s gives me the best brownies. Slightly dense and moist in the middle, a crunchy top and appropriately chewy.

Best Brownies (makes 18 brownies)

For the batter:

  • 100 grams of dark chocolate in chunks
  • 150 grams of butter
  • 4 eggs
  • 200 grams of sugar
  • 1 tsp vanilla essence
  • 100 grams of flour
  • 55 grams coco powder
  • 1 pinch of salt

Optional filling

  • 70 grams chopped almonds, walnuts, hazelnuts and/or peanuts
  • 70 grams of chocolate, whichever you prefer
  • Alternatively you can mix in chuncks of your favorite candy bar (I like Snickers, but any other chocolate candy bar could work)

Every recipe calls for a different order for mixing the ingredients. In my experience it doesn’t really matter how you combine the ingredients, just make sure you don’t cook the eggs with the hot melted chocolate.

  1. Preheat your oven at 190 degrees C.
  2. Melt your chocolate and butter above simmering water.
  3. Line your baking tin (I use a  rectangular 15 cm by 30 cm baking tin).
  4. Take your melted chocolate of the heat, let it cool for a few minutes.
  5. Mix in the vanilla essence, sugar, this lowers the temperature of the chocolate a little more.
  6. Combine with the eggs, flour, salt and coco powder.
  7. Stir in the optional filling.
  8. Pour the batter in the baking tin and bake for 30 to 40 minutes.

Your cooking time depends on how dense you like your  brownies. Sometimes I slightly undercook my brownies. This way I can warm them up later (and cook them a bit more) in the microwave and serve them warm with vanilla ice cream or clotted cream.

Father’s favorites

koekjes2In the Netherlands, June 14th will be fathersday this year. Obviously I would like to state that me and my toddler are  daddy’s favorites. However, these cookies also go down well. They are a dutch classic: speculaasjes. The dough should be made beforehand, so the spice mix can flavor the entire dough. I recommend making the dough 2 days before fathersday, then making the cookies with your toddlers 1 day before fathersday.

I have this recipe from a dutch classic cooking book aptly named; “Het nieuwe kookboek“. This is a great book for beginners, let’s call it the “silver spoon” of the Netherlands. My toddler and I tested this recipe for valentine’s day and it was a huge hit!

Getting your hands on some real speculaas might be difficult for you, I do promiss you that this festive spice mix will put a smile on your face, it is like cinnamon for grown-ups (although your kids will love it too). For the UK, check out this site, or make your own blend.

Father’s favorite cookies (40 to 50 cookies)

  • 110 grams butter
  • 90 grams of light brown sugar
  • 1 pinch of salt
  • 2 tsp of speculaas spice blend
  • 1 tbsp of beaten egg
  • 100 grams selfraising flower
  • Almonds, sugar pieces or sugar decoration

Mix all the ingredients and combine into a ball of dough. Wrap the dough in cling film. Let it rest in the fridge for 1 to 4 days. This will allow for the spices to flavor your dough.

Take the dough out of your fridge 1 hour before rolling it out.

Preheat your oven to 170 degrees C.

Roll out the dough to a thickness of 5 mm. Use flower to prevent your dough from sticking. Cut out any shape you like. Place your cookies on a baking sheet lined with grease proof paper. Sprinkle your decorations, sugar and/or almonds on the cookies and lightly press them in.

Bake your cookies for 20 minutes, take them out to cool on the sheet.

Once cooled, the cookies keep for about a week in an air tight container. My son even decorated his own container for daddy.

Koekjes1


My favorite high tea recipes

For my birthday this year I organised a high tea. I received many compliments for the entire spread. It did take me a whole day to prepare for it, but it was delicious! This is a list of the food I made, and some tips.

?

  1. Omelet rolls: Mix up eggs, finely sliced chives and some cream to make the egg mix. Fry thin omelets. Let the omelets cool and spread out cream cheese, cover with ham. Roll the omelet up. Wrap your omelet roll in cling film. You can make the rolls 1 to 2 days in advance. For serving, slice and serve these lovely pinwheels.
  2. Fruit punch: Peel and slice your favorite fruits. Make sure you have various colors. Add some fruit juice. Cool your punch and serve it in dainty glasses.
  3. Mini chocolate mousse: Make your favorite mousse recipe and serve in shot glasses or little jam jars. I garnished them with dried cranberries.
  4. Small cups of vichyssoise soup: This simple cold soup is made with potato, onion and leek. I served it in small glasses with a teaspoon of greek yoghurt and some chives.
  5. Scones: My most important tips: don’t knead your dough, rub to combine the flower, sugar and butter, then stir to combine using milk or buttermilk. Wrap your dough in cling film and let it cool for up to 24 hours (in your fridge). This way you can work ahead. Take your dough from the fridge and cut your scone shape quickly then bake right away. Cooling and resting your dough gives you the lightest scones you ever had!
    For those who don’t live in the UK: use mascarpone instead of clotted cream.
  6. Savory pies: Using puff pastry line a muffin mold. Fill each cup with ham, peas, cheese. Fill the cups up with eggs and cream. Bake for 20 mins at 220 degrees C.
  7. Pizza squares: Make a large pizza a day before. Warm it up in a 160 degrees C oven for 20 minutes. Cut your pizza into squares and serve.
  8. Cut candy bars into bite size chunks for inexpensive little treats.
  9. Serve with tea, coffee and white wine

For a relaxed party:

  • Make sure you prepare well in advance and make lists.
  • Find recipes you can prepare 1 or 2 days in advance that take little assembling.
  • Ballance hot, cold, sweet and savory dishes.
  • Don’t try complicated recipes for the first time.
  • Make sure you have enough refridgerator space.
  • Make sure you have enough oven space.
  • Make sure you have enough china. Buy teacups and saucers at your local thrift shop or lend them from friends and family.
  • Use some disposable plates and cups, for less washing up.

Simple Seasonal treat: Spinach quiche

As you might know. I like making vegetable quiches and pies. This is a lovely way to eat your spinach!

For a vegetarian alternative I would replace the bacon with a handful of toasted nuts like pine nuts.

Spinaziquiche

Spinach quiche

  • Pastry:
    • 100 gr flower
    • 60 gr butter
    • 1 tsp salt
    • 50 ml water
  • Filling:
    • 300 gr of fresh spinach leaves
    • 1 tbsp olive oil
    • 100 gr Bacon cubes
    • 125 gr soft goats cheese of feta cheese
    • 3 free range eggs
    • 75 ml cream
    • Pepper and ground nutmeg to tast
  1. Prepare your base as described in my asparagus pie recipe.
  2. While your base bakes:
    1. Clean your spinach leaves.
    2. Fry your leaves in the oil until all spinach has wilted.
    3. Place your spinach in a collinder and let the access water drain out.
    4. Fry your bacon cubes until they are crisp.
    5. Wisk and mix your eggs and mix in your cream.
  3. Build your pie:
    1. Divide your spinach and bacon over the base.
    2. Pour over the egg and cream mixture.
    3. Crumble the cheese over the top.
  4. Bake for 20 minutes in a 200 degrees C oven.

Simple Seasonal treat: green asparagus pie

I love eating vegetables at their absolute best. Asparagus are one of the most seasonal vegetables for me. During the asparagus season I am always looking for simple dishes that do this tasty ingredient justice.

Aspergetaart3

The cheese and eggs in this recipe enhance the asparagus flavor. Serve it with a salad , a glass of white wine and you have a complete and healthy spring meal.

Feel free to use ready-made short crust pastry or quiche dough, for an even easier meal.

Because I am a busy mom, I like making pies ahead. That way, I can play with my toddler when I get home from a busy day while the pie warms in the oven. To warm up your pie place it in a preheated oven of 160 degrees C for twenty minutes.

Aspergetaart

Asparagus pie

This recipe is for a 25 cm quiche mold.

  • Short crust pastry:
    • 100 g flower
    • 60 g butter
    • 1 tsp salt
    • 50 ml water
  • 150 gr green asparagus
  • Filling:
    • 3 free range eggs
    • 75 ml cream
  • 1 cup of grated strong cheese like old Gouda or Parmigiana
  • Pepper and ground nutmeg to taste
  1. Preheat your oven to 200 degrees C.
  2. Make your short crust pastry:
    1. Rub the butter into the salt and flower until the texture resembles bread crumbs.
    2. Combine the crumbles into a dough by stirring the water in gradually. Combine the dough, don’t knead it. If you fuss around less with your dough, your dough will be more crumbly. For an even more crumbly result, wrap your dough in cling film and let it rest in the fridge for 30 minutes.
  3. Make your pie base:
    1. Roll out your pastry to a 5 mm thickness.
    2. Line the a greased quiche mold with your delicious pastry.
    3. Line your mold with some baking parchment and fill your pie with dried beans or actual baking beans.
    4. Bake in the oven for 20 minutes.
  4. While your base is in the oven, prepare your asparagus:
    1. Remove the hard section of each asparagus. This is usually about 2 cm, depending on how fresh your asparagus is.
    2. Place your asparagus in a pan of cold water. Bring the water to the boil.
    3. When the water boils, immediately take your pan of the heat and cool your asparagus in cold water.
    4. Let your asparagus dry.
  5. Prepare your filling by mixing the cream and eggs.
  6. Take your base out of the oven and let it cool for 10 minutes. (Leave your oven on!)
  7. Build your pie:
    1. Cover the base of your pie with cheese.
    2. Pour in half your filling.
    3. Sprinkle with pepper and nutmeg.
    4. Arrange your asparagus. You might need to trim your asparagus a bit for this step. Try to make one nice even and neat layer of asparagus.
    5. Add the rest of the filling.
    6. Sprinkle over the remaining cheese.
  8. Bake your pie in the oven for 20 minutes at 200 degrees C.

Enjoy!

Asparagus pie

Fabulous five! Mothersday

Mothers day is in exactly 1 week (in the Netherlands). My mom is getting a homemade gift, from the heart. Here are my top 5 picks;

  1. My mom loves reading. A personalized bookmark would be a good idea!
  2. A heartfelt sweet message on a board or a card
  3. Make an egg cosy with some felt! Perfect combined with a surprise breakfast in bed!!

    through Ariadne at home

  4. Say it with food! Bake a special apple pie
  5. Make a simple and personal card